If you have yet to watch the Star Wars Speeder Bike final assembly video, then you might want to check out the following link first: https://www.youtube.com/watch?v=m8YaHpaRTOY. What I've uploaded here are far more detailed closeup photos of the Speeder Bike. And as I mentioned in the previous post, the bike is not entirely finished yet. After final assembly I realized I had completely forgotten about the bike's water decals as well as overlooked some minor paint details. It's very close to being finished though, at about 95% complete. So the finish line is in sight.
.jpg) |
Speeder Bike work-in-progress: 95% complete; still needs decals and minor painted details
|
Final assembly of the Speeder Bike was split into two pseudo-phases. Phase one involved the attachment of the Steering Vanes/Outriggers onto the Lower Hull followed by the Upper Hull. While the phase one process seemed fairly straightforward, it was in reality quite nerve-wracking. Having to snap-fit large sub-assemblies comprising fragile parts, I was always fearful of breaking something because considerable force is required to ensure the joints come together as seamlessly as possible.
.jpg) |
From top to bottom: Lower Hull, Upper Hull, and Steering Vanes/Outriggers
|
.jpg) |
Star Wars Speeder Bike, after Phase One of the final assembly ...
|
.jpg) |
... comprising the three aforementioned sub-assemblies all attached together.
|
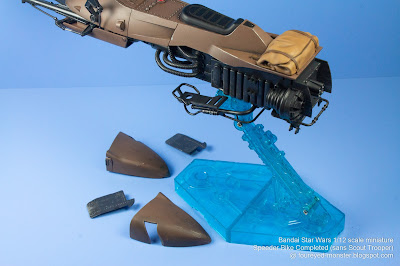
Meanwhile Phase Two was appreciably easier as it only required the snap-fit of the bike's rear Side Armor/Hull Plates and Air Brakes (see below). There are actually two display options for the Air Brakes i.e. one with the flaps closed over the thrusters, and one with the flaps open. I chose the former as I plan to display the Speeder Bike together with the Scout Trooper and Girl's Rider figurine in a static pose. When you think about it, you can also mix-and-match i.e. have the left flap open and the right one closed if you want to do a vignette of the bike turning right, and vice versa.
.jpg) |
Phase Two of the final assembly focuses on the rear of the Speeder Bike ...
|
.jpg) |
... specifically attachment of the Side Armor/Hull Plates and Air Brakes of which ...
|
.jpg) |
... the former covers up the Thrust Arrays while the latter directs the thrusts generated.
|
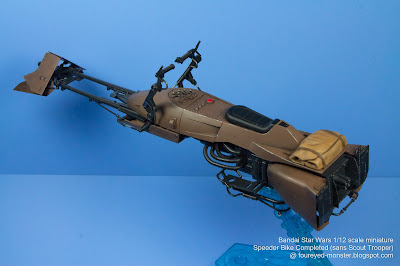
It was only after I had fully assembled the Speeder Bike did I notice I had forgotten to apply water decals as well as forgotten to paint some minor details on the bike. Only once I have done both will the bike be considered complete. The following is a series of photos of a nearly-complete bike.
.jpg) |
A nearly complete Star Wars Speeder Bike, attached to a clear blue display stand
|
.jpg) |
| Side profile (viewed from the left) of the Star Wars Speeder Bike |
.jpg) |
Star Wars Speeder Bike still requires some minor details to be painted ...
|
.jpg) |
... as well as have water decals applied, primarily to the hull.
|
.jpg) |
| Side profile (viewed from the right) of the Star Wars Speeder Bike |
.jpg) |
Scout Trooper (not shown here) will be the final piece that completes this kit
|
Of course once the Speeder Bike has had decals applied on it and additional minor details painted, it will be finally ready for a photo shoot with an already completed Scout Trooper. And once that is done, both will be posed with a yet-to-be-finished Girl's Rider figurine. Just to recap if you're wondering what I'm talking about, all three are part of a Join-the-Empire vignette that I am doing.
.jpg) |
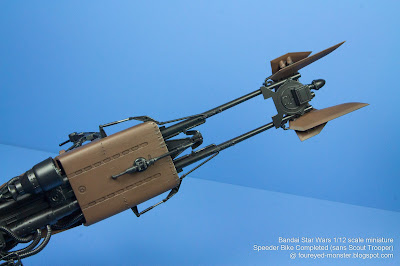
Bottom view of the Speeder Bike, from the rear and mid-sections ...
|
.jpg) |
... all the way to the Steering Vanes and Outriggers.
|
.jpg) |
Closeup view (front end / bow) of the Star Wars Speeder Bike
|
.jpg) |
| Closeup view (mid-section) of the Star Wars Speeder Bike |
.jpg) |
| Closeup view (rear end / stern) of the Star Wars Speeder Bike |
As I type out this last paragraph, I guess it's worth pointing out that I've since went ahead to apply the water decals on the Speeder Bike as well as finish painting the minor details I had overlooked. However, I haven't had time to edit the photos and video I took of the process. So while I do the necessary edits, I may upload some interim posts of another work-in-progress project, specifically the Space Battleship Yamato 2199 (Cosmo Reverse Version). So do look out for that in the future. For now, it's time to end this post. Keep on hobbying, stay safe, and be well.
.jpg)
.jpg)
.jpg)
.jpg)
.jpg)
.jpg)
.jpg)
.jpg)
.jpg)
.jpg)
.jpg)
.jpg)
.jpg)
.jpg)
.jpg)
.jpg)
.jpg)
.jpg)


.jpg)

Cracking job on this Speeder Bike, lovely colors and wonderful looking rear...
ReplyDeleteThank you very much Phil :)
DeleteI always find your work educational and fascinating. I'm looking forward to the decals and final stage :)
ReplyDeleteThank you Suber, your kind words always make my day!
Delete