Sunday 28 November 2021

Green and Blue Reversible Backdrop for future Chroma Key Compositing of Images and Videos

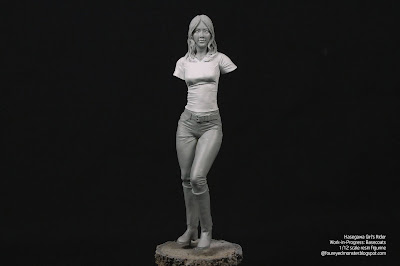
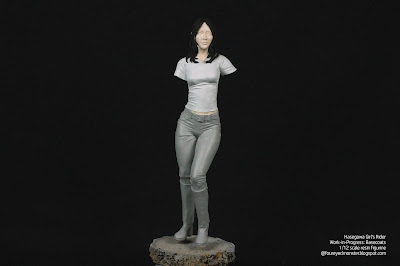
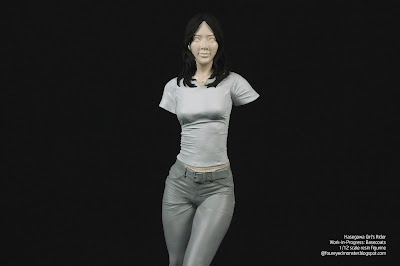
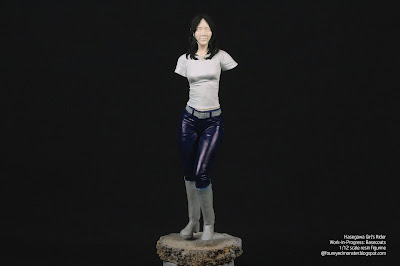
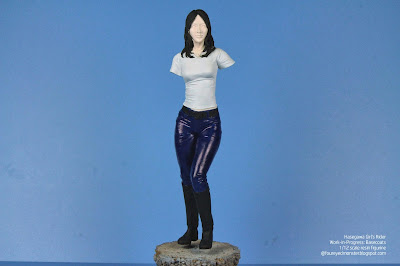
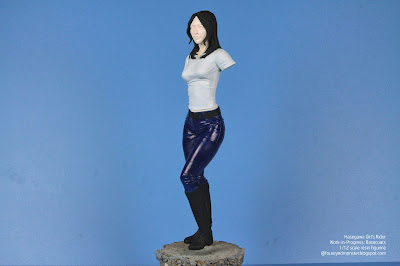
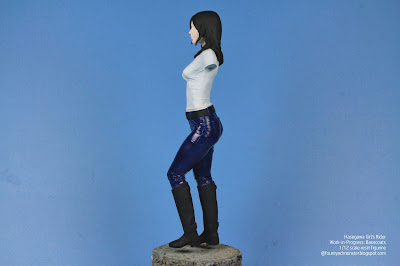
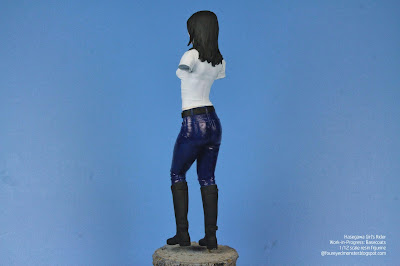
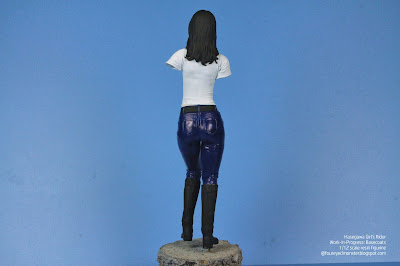
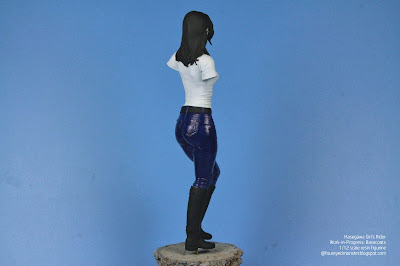
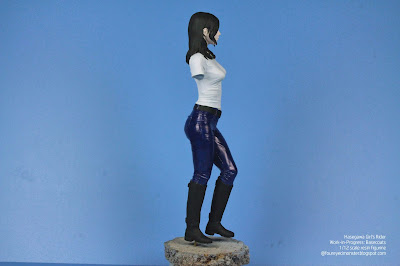
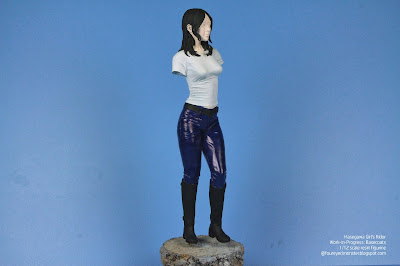
 After spending an inordinate amount of time painting our miniatures, most of us are guilty of not putting equal effort into the final photos or videos of the finished project. I am no exception. Though I do try, there is still so much more about photography, video recording, and their post-production processes I should know in order to make the painted miniatures look like they do in real-life to the naked eye. I am also guilty of placing the miniatures against just plain backgrounds. With that playing on my mind, I plan to spice things up once in a while by using a green/blue chroma key backdrop.


 While I have had my eye on a green screen backdrop for quite some time, more so now that I have the requisite post-production editing tools, I could never quite get my hands on one. This was mainly due to the high prices that these chroma key screens usually fetch. Finally though, I managed to find a close to year-end bargain of a Selens green/blue reversible backdrop. Being an on and off again photography enthusiast, I don't really know much about Selens apart from it being a company whose products focus mainly on photography equipment and accessories. So I figured I would be better getting a chroma key screen from such a company rather than any regular green cloth. 


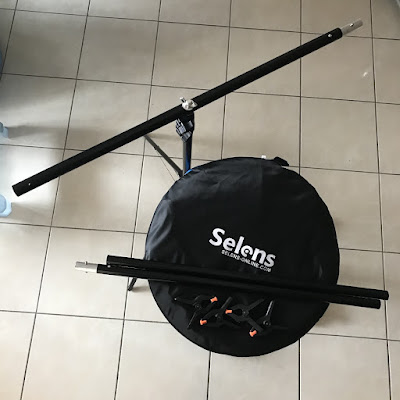
Selens green/blue screen reversible backdrop with T-type tripod stand, yet to be unpacked

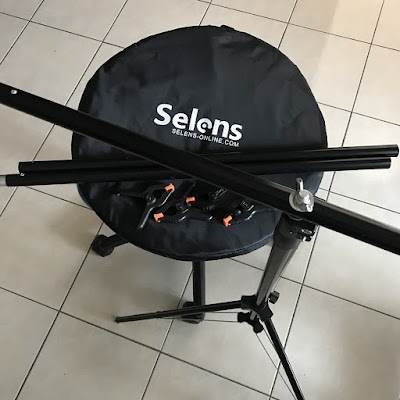
Backdrop is folded inside the round zippered bag, shown here with the various tripod parts

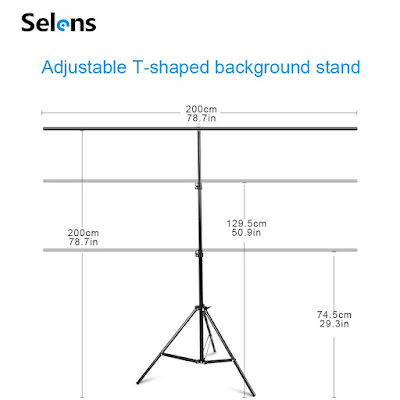
 Together with the actual chroma key screen, which came in a round protective bag, this particular bargain I got online included a T-type tripod stand and four clips. The latter group of items function to hold up the chroma key screen. The top bar can be lengthened up to around two meters using rod bar extensions (see below). But in practice, I didn't need to do this because the screen I bought was the smaller 1.5 m  by 1.0 m. The stand was intended to hold screens up to 1.5 m by 2.0 m in size. 


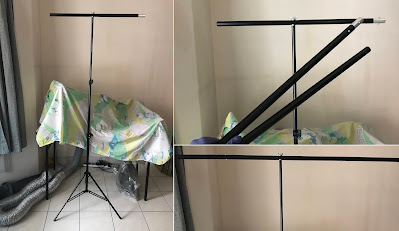
Start from left then clockwise: T-type stand being set up to full length

 With the backdrop being reversible, that is one side green and the other blue, I can easily chose which chroma key I want to use as my screen backdrop. Moreover, the quality of the screen is good enough that the colors don not bleed into each other when exposed to bright lighting (see below). 

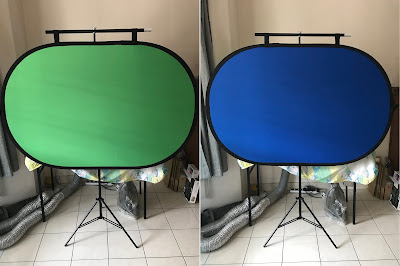
Reversible Green/Blue Screen under natural sunlight; note the T-type stand did not need to be at full length in order to hold the backdrop (the extension arms were removed)

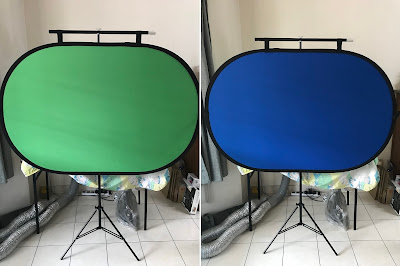
Reversible Green/Blue Screen under natural sunlight and a source of LED fluorescent light

 For those of you who might be interested in getting such a product for themselves, I have included the technical specifications as provided by the Selens product pages (see below).   


 But hold on a minute. I have been going on and on again about the chroma key green/blue screen that I never stopped to consider that some of you might not know what it's  used for. Sorry about that. In the unlikely event you do not, please refer to this article on https://www.premiumbeat.com/blog/blue-screen-vs-green-screen/. Anyway it'll be back to painting in the days to come. Using the chroma key screens will have to wait for now as I strive to get my painting projects up and running. Until next time dear reader, please stay safe and be well.


https://www.facebook.com/FourEyedMonster-313145002078520/

Sunday 14 November 2021

Girl's Rider - Hasegawa 1/12 scale resin figurine [Block painting sections with the appropriate basecoats]

 It only took a year of sustained procrastinating but painting sessions have resumed again. Sarcasm aside, it feels good to finally work with paint again. While prepping and priming is an integral part of the hobby, those steps aren't as fulfilling creatively as laying colors on a miniature. At this early stage, the only paints being utilized are basecoats that function as foundation layers on which other hues will rest. Basecoats also serve to block off sections of the figurine into its appropriate colors. 


1/12 scale Girl's Rider figurine [work-in-progress: block painting basecoats]

 A mishmash of techniques and materials were at play when laying down the basecoat colors. Various sections of the primed figurine received different types of paint via disparate means of delivery. For example the flesh areas and t-shirt were airbrushed with lacquer paint and fine primer respectively while the hair, jeans, belt, boots, and gloves were hand-painted with acrylic paint. It's important to note that when working with both lacquer and acrylic paints: it's generally okay to paint acrylic on top of lacquer paints but NOT vice versa! So please be aware of at least this point.


Basecoat paint and primer colors used so far in the block painting process

 Block painting was carried out in phases starting with the upper-half of the figurine. First, the whites of the t-shirt was blocked off using an extremely fine surface primer i.e. the Mr.Hobby Mr.Finishing Surfacer 1500 White. In an ideal situation I would've preferred to use flat white lacquer paint instead of a primer. However, I didn't have any of the former on hand. Moreover experience told me it's time consuming to achieve smooth whites using acrylic. Hence the compromise. Luckily I had plenty of Gaia Color lacquer paints for the skin tone, which was airbrushed onto the face and arms/hands. 


First basecoat layer to be applied onto the Girl's Rider figurine ...

... was the whites of her t-shirt, using the Mr.Finishing Surfacer 1500 White.

Second basecoat applied was the figurine's skin tones through the use of ...

... an old (and no longer produced) Gaia Color flesh color formula ...

... and this was applied onto the face, arms, and hands.

  To complete the basecoat layers for the upper half of the figurine, her hair was basecoated by hand with acrylic paints comprising a mixture of two Vallejo Model Color hues namely German Camouflage Black Brown (70.822) and pure Black (70.950). This will serve as the foundation of black brownish hair that I intend to paint for the Hasegawa 1/12 scale Girl's Rider figurine.


Third basecoat layer was placed on the hair comprised a mixture of ...

... Vallejo Model Colors German Camouflage Black Brown and pure Black.

 With the basecoat layers completed for the upper-half, it was time to work on the darker hues of the lower half. This entailed the use of Vallejo's Dark Prussian Blue (70.899) for the jeans and pure Black (70.950) for accessories such as the belt, boots, and gloves. One unintended result of using the former was how glossy the dark blues looked. Whether this will be a significant factor when other blue hues are layered onto jeans, time will tell. Meanwhile, the blacks were flat which was fine by me.


Fourth basecoat layer was for the dark blue denim jeans ...

... which was done using Vallejo Model Color Dark Prussian Blue.

Final basecoat layer was pure Vallejo Black for the accessories  ...

... such as the leather boots and belt as well as ...

... the leather gloves, which are being held by the right hand.

 Below is a series of photos showing the figurine fully basecoated with the appropriate colors. All pictures were taken against a bluish background in order to better contrast the dark areas.


Each sequentially layered basecoat involved a fair bit of masking ...

... actually it was only for the first two layers (i.e. white shirt and skin tones) ...

... because these aforementioned layers involved airbrushing and the inherent ...

... lack of control as to where any overspray may land on the figurine ... 

... This was unlike the later basecoat layers such as those on the ...

... hair, belt, jeans, boots, and gloves ...

... which were all painted by hand using regular paint brushes ...

... Painting by hand removed the need for any masking because ...

... I had much better control over where the new paint layers landed ...

.. thus easily preventing them from encroaching into the earlier layers.

 Going forward from here, the 'real' work will begin. Next up is the selection of paint colors to form the general color scheme of the entire piece. It's also the stage where I tend to overthink things the most. One color scheme after another is selected, discarded, re-selected, discarded again, put on hold, etc. You get the idea. Anyway, this time around I expect the selection process to go much faster seeing that it's only an East Asian female clad in white t-shirt, blue jeans, and black accessories. Easy peasy lemon squeezy, right? Right? Well, we'll see I guess. Until then, stay safe and be well! 


https://www.facebook.com/FourEyedMonster-313145002078520/

https://shireworks.blogspot.com/https://www.facebook.com/shire.works

Related Posts Plugin for WordPress, Blogger...