Friday 26 April 2019

Transformers Bumblebee in Volkswagen Beetle form [WIP - Fan Housing & Engine Installation]

To paraphrase Colonel John "Hannibal" Smith, I love it when a kit slowly comes together. Sometimes to prevent hobby malaise from settling in, one must meander through relatively tedious bits which largely occur when assembling and painting individual parts of a greater sum you can not yet see. But when a part of the bigger picture starts to take shape, the feeling of accomplishment is a tangible one. It further fuels the desire to continue work on the kit therefore keeping any hobby malaise in check. And so it is with the Volkswagen Beetle 1300 engine as it gradually unfolds before my very eyes.

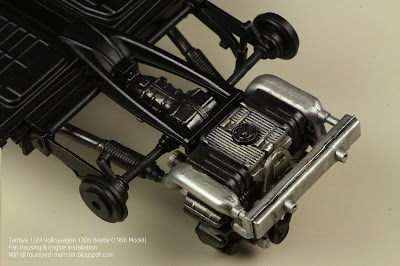
Bottom view (from left) shows muffler connected to exhaust manifold heat exchangers located on either side of the oil strainer while what seems to be the rear suspension/brakes link the undercarriage to the engine
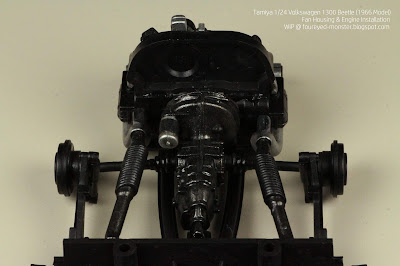
Top view (from left) shows the fan housing and belt on the engine with the heat exchangers, rear suspension/brakes and transmission located between the engine and the upper part of the undercarriage onto which interior parts will attach

What you see above is the actually the results of Steps 3 and 4 of the Tamiya 1/24 scale Volkswagen Beetle 1300 (1966) kit. As with the earlier steps, I had decided to paint up the individual parts first before assembling them all together. Up to this point, the color scheme is pretty much a black and metallic combo with a smattering of engine grime and oil to up the realism factor.

Instructions for the Volkswagen 1300 Beetle fan housing and engine installation
Undercarriage, fan housing, fan belt, muffler, exhaust manifold heat exchangers, etc. were painted before assembly
Only new material used from previous step was the Tamiya X-11 Chrome Silver acrylic paint in lacquer thinner

Other than the paints and weathering materials in the previous steps, only one new paint was used namely the Tamiya X-11 Chrome Silver thinned using lacquer thinner instead of the Tamiya X-20A acrylic paint thinner. This is possible because Tamiya acrylic paints are formulated such that they work equally well with lacquer thinner. One advantage of using lacquer thinner to thin Tamiya acrylic paints is that the resulting coat is supposedly stronger. Personally I did it just to test out whether there was any truth to the claim that Tamiya acrylics could mix with lacquer thinner.

Front view: engine as it stands now prominently shows the muffler, fan belt/housing, intake manifold, ignition coil, etc.
In an angled view, the exhaust manifold heat exchangers (running from the muffler to undercarriage) becomes visible
Nestled in the middle, between the engine and undercarriage, is the transmission

Only at extreme closeups does one begin to truly appreciate the details inherent in this Tamiya kit. To achieve this I dusted off my dedicated macro lens and snapped most of the photos on this blog post. 

Viewing angle above affords a better of the VW Beetle transmission
Back of fan housing lacks detail, presumably becomes it will be glued/attached to another part
Wheel-like contraptions attached to the rear axle are the rear brakes
A huge part of what can be seen now may not be visible after additional assembly steps
Can you spot the difference between the flat aluminum and chrome silver? The latter is shinier

With the undercarriage attached to the engine, the platform upon which the Volkswagen Beetle will be built is now set. It's unlikely that the undercarriage will remain in its current state i.e. semigloss black finish with minimal wash effects. Final weathering plans isn't set in stone. But based on the Bumblebee movie, chances are it will involve addition of brown or ocherish dry mud and dirt.  

Undercarriage was primed in black, coated in semigloss clear coat and given a black wash; weathering comes later
Oil strainer is surrounded by the muffler, exhaust manifold heat exchangers and transmission
Look closely at the oil strainer and you can see some spilled oil effects
Undercarriage protrusions fit snugly enough atop the transmission and to the side of the oil strainer
For an assembly consisting of many tiny parts, the assembled whole is surprisingly sturdy

Painting up the parts first before assembling them together certainly has its pros and cons. Pros - it makes color separation easier while livening up the assembly process. Cons - it can make the assembly process harder by coating joints in paint or result in damage to the paint while the parts are being forced together. In the case of the Beetle, both pros and cons have occurred. That being said, I wouldn't have it any other way as the pros largely outweigh the cons, for this kit anyway.

Color scheme so far comprises all manner of blacks and metallics covered with engine grime and oil
Flat aluminum surfaces look more realistic after being weathered with engine grime
Black surfaces take on either a gloss, semigloss or flat look to offer variation to the monotone scheme
Only uncertainty thus far is whether I've attached the muffler correctly to the exhaust manifold; time will tell
Undercarriage factory-new look will likely undergo further dry mud and dirt weathering

Next two steps will involve the Beetle's front uprights and suspensions, on the other end of the undercarriage. So there's still much work to be done before the more visible car interior and body is even touched upon. Slow and steady, I always say. For I know no other approach to this hobby.

https://www.facebook.com/FourEyedMonster-313145002078520/

Saturday 20 April 2019

Space Battleship Yamato 2199, Cosmo Reverse Version [WIP - Finding matching colors for the hull and deck]

You would think that finding matching colors for the hull and deck of the Super Battleship Yamato is a pretty straightforward exercise. Then again, I tend to overcomplicate things by overthinking solutions to problems arising out of extensive research. And so it was with the Yamato. Over the years there have been quite a few versions of this iconic anime spaceship. They can be largely grouped into three distinct color schemes namely an all-metallic one from the live-action movie, and either a neutral gray-red or blue gray-red from the original anime as well as remake series. 

Space Battleship Yamato (top to bottom) as seen in the live-action movie, season one and two of the anime series remake

Adding to the possible iterations of its color scheme is the fact that Yamato's deck also comes in various hues such as traditional navy ship wooden deck tan, pale violet brown, metallic, or a color identical to the upper hull. Whether all these color options is viewed either as a hindrance or a scale modeler's wet dream is down to a matter of perspective. Personally I'm for the latter as the more color schemes available to a subject matter, the greater its artistic potential. And as for the Super Battleship Yamato 2199, Cosmo Reverse Version, I plan to use the blue gray-red-pale violet brown color combination. There'll be plenty of opportunity to use other schemes in future builds.  

Bandai Color Guide for the Space Battleship Yamato 2199, Cosmo Reverse version
Paint equivalents for the 1/1000 scale Cosmo Reversion version as translated into English by www.mech9.com

Meanwhile, I noticed a trend in the Bandai Color Guides in which they are slowly transitioning from recommending Mr.Hobby's lacquer-based Mr Color paints to its water-based acrylic Hobby Aqueous Color paints instead. As I mainly use the former, it's getting harder for me to find the exact paint recipes to mix the colors I need. One way around this is to refer to Color Guides from the older Bandai scale model kits. Sometimes this is unnecessary as the Mr.Hobby acrylic paints have their lacquer equivalents. It's when they don't when it becomes harder for me to achieve color accuracy.

Color Guide for a 19-year-old Bandai Space Battleship Yamato 1/500 scale model kit
Paint equivalents for the 1/500 scale Yamato as translated into English by www.mech9.com

For this project, I used a combination of color guides from an older kit (released late-2010) and the present kit namely the Space Battleship Yamato, Cosmo Reverse Version. The reds and grays of the Yamato were based on paint recipes of the older 1/500 scale kit while the deck was based on the recipe of the existing kit. Luckily for me, the latter recipe suggested acrylic paints that had lacquer equivalents. So with the main exterior colors accounted for, I was good to go. And then to create some variation of these main colors, I plan apply weathering using oil and enamel-based paints.  

Space Battleship Yamato Reds and Grays mixed at a paint ratio recommended in the older kit's color guide
Resulting mix of the Yamato Gray hue looks very close to the sprue's molded color i.e. a bluish gray
Ditto for the Yamato Red hue which looks almost a 100% match to the sprue color
While Yamato's decks are molded in blue gray, the color guide recommends a kind of pale violet brown

On a side note, I was lucky to come across a set of discontinued paints created specifically for the Space Battleship Yamato circa 2199. While I do not intend to use them on this project, they did provide me with a reference point for what is deemed as officially acceptable colors for the Yamato.  

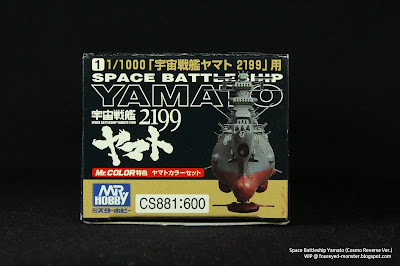
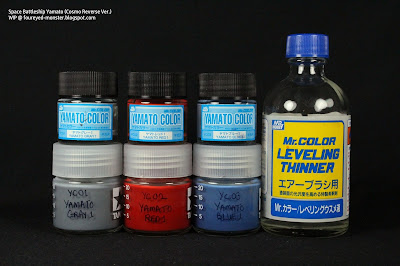
Mr.Hobby Mr.Color Special Set - Space Battleship Yamato 2199 (seemingly no longer in production)
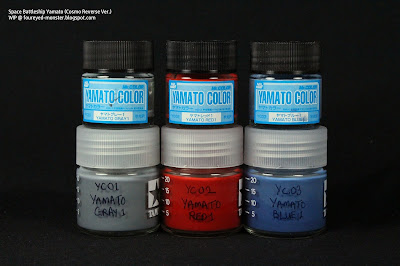
Paint hues provided in the Mr Color Space Battleship Yamato 2199 Special Set
A pictorial guide showing where on the Space Battleship Yamato to apply the paint colors
In keeping with the photo above, the Yamato Gray is more of a light neutral gray vs the blue gray mixture
Before storage, the paints were thinned with Mr.Color Leveling Thinner at a ratio of 1:1
A closeup look at the Yamato hues as found in the Mr.Hobby Mr.Color Special Set

Of the three colors provided in this set, I was particularly interested in the shade of red and gray. While the red seemed similar to the batch I mixed up, the gray was more of a neutral gray. As a stickler for color accuracy, I feel that having this official color paint set is absolutely priceless.
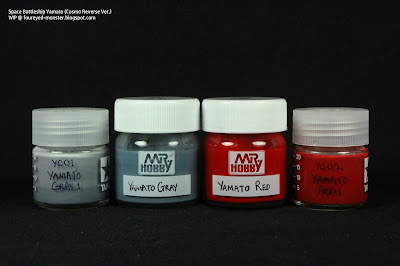
Comparison of the mixed Yamato grays and reds versus the ready-made ones in the Mr.Color Special Set

So with the paint colors all mixed up, at least the main ones, it's time to assemble the Bandai 1/1000 scale Super Battleship Yamato 2199, Cosmo Reverse Version. Some Yamato kit variations allow for the addition of LED lights. This one though, does not. As such, the assembly should be fairly less complicated. With that I leave you with a quote often attributed to Captain Okita, the first commander of the Space Battleship Yamato ... The less time you have, the more you need to use it wisely.

https://shireworks.blogspot.com/https://www.facebook.com/shire.works

Friday 12 April 2019

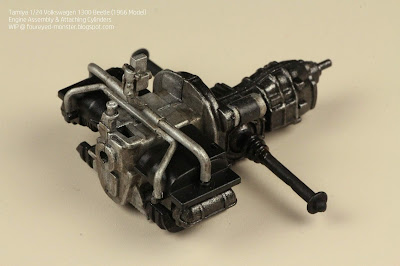
Transformers Bumblebee in Volkswagen Beetle form [WIP - Engine Assembly & Attaching Cylinders]

If there is ever a synopsis of why my projects take so long to complete, I suppose it can be summed up in one sentence. Slowly, in a painstaking manner, the modeler painted tiny parts of which most may never see the light of day. And so it is with the Tamiya 1/24 scale Volkswagen 1300 Beetle (1966 Model). Specifically its engine assembly which eventually will be covered up first by other mechanical parts before being enclosed by the car body. If I've analyzed it correctly, then certain parts will still be visible in the final build, but the majority won't be. This begets the question ... why do it?

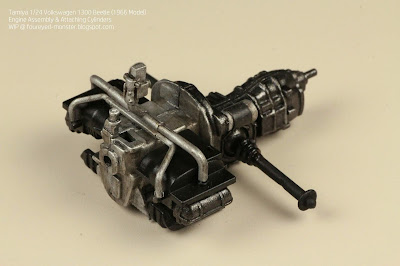
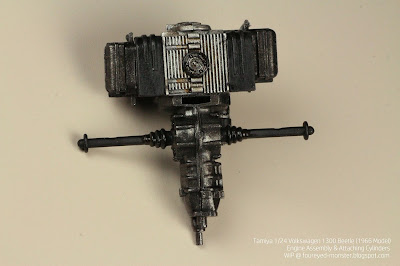
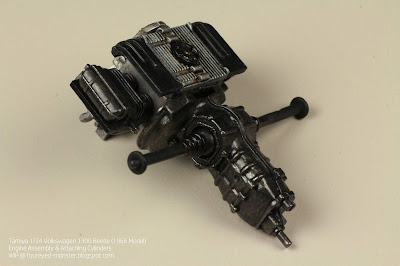
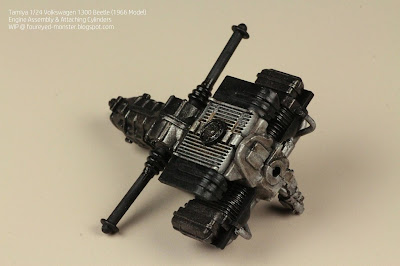
Top angled view of the Tamiya 1/24 scale VW 1300 Beetle engine assembly
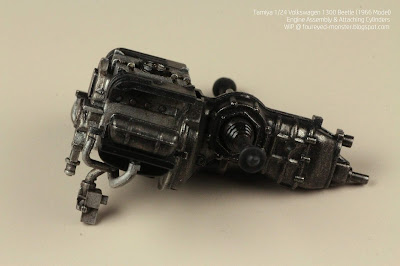
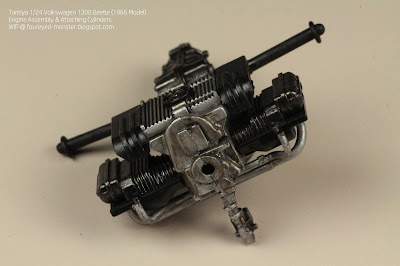
Bottom angled view of the VW 1300 Beetle engine assembly

Well, the easy answer to this is I can't not do it. The frowned upon double negatives aside, I am seriously plagued by the need to paint in every little detail I see regardless of whether it is visible in the final build. And even at this early stage of the build, the details inherent are astounding in this 1/24 scale replica of the Volkswagen 1300 Beetle engine. If I had left everything unpainted then it will forever bug me that the scale model kit is not complete even if it looks finished from the outside. One positive: my need to fill out the details invariably rubs off on the visible parts. 

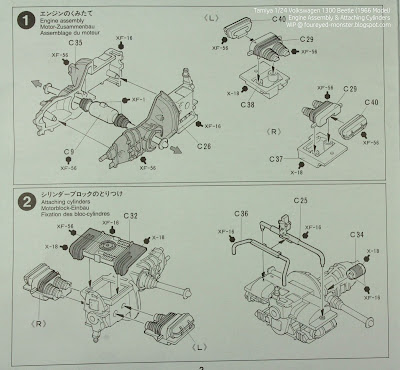
Instructions for the Volkswagen 1300 Beetle engine assembly and attachment of cylinders
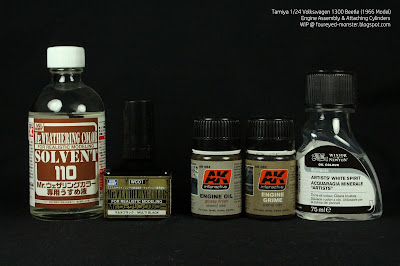
Paint materials used in priming, base-coating and clear-coating the Beetle engine assembly and cylinders
Weathering materials used to outline the engine parts as well as add engine oil and grime effects
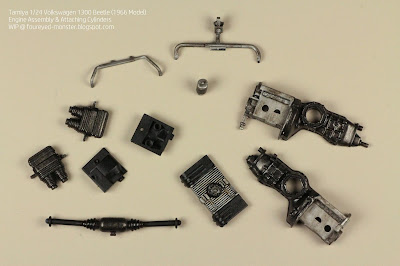
Engine parts comprising the cylinders, transmission, engine block, oil strainer system and swing axle

Paint job involved recreating metallic textures such as flat aluminum and metallic gray as well as non-metallic ones such as flat, semi-gloss and gloss black. The blacks were easy enough. However the metallic hues had issues inherent with the Tamiya Acrylic metallic paints in that they are notorious for flaky finishes. While weathering somewhat reduces how noticeable the metallic flakiness is, it's still there if you look hard enough - not so much for the flat aluminum texture compared with the metallic gray finish. I'm able to live with it only because most will be hidden from view eventually.

Weathering consists of black wash outlines plus application of enamel effects such as engine oil and grime
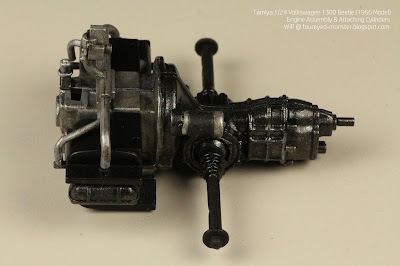
Side view showing (from left): engine and cylinders; swing axle and transmission
Seam lines aren't so evident on the transmission due to the dark hues and the way the piece was molded
Engine oil effects were added to the swing axle as moving parts would be exposed to said oil

Meanwhile weathering effects involved usage of AK Interactive enamel-based products like AK082 Engine Grime and AK084 Engine Oil. Incidentally my use of enamel colors came about quite by accident. My initial plan was to use Vallejo Weathering Effects acrylic products. Sadly all five bottles of paint that I had intended to use had spoiled. Pigment sediments had separated completely from the dissolving solution and the whole paint product couldn't be reconstituted.  
Tube-like contraptions on the engine (aluminum section) took a bit of patience to attach properly
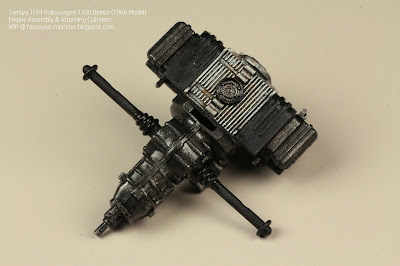
Side view showing (from right): transmission, swing axle and then the engine/cylinders
Seam lines across the engine (aluminum section) will be hidden from view in the latter stages of assembly
Long horizontal aluminum tube (located at the center) is the intake manifold
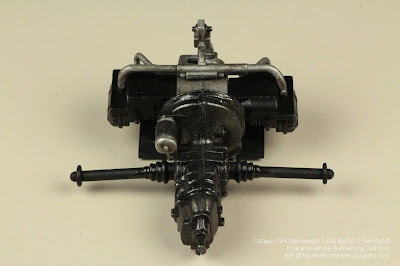
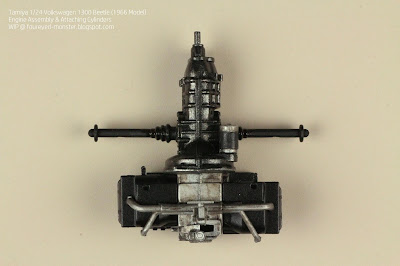
Top down view showing (from top to bottom): transmission, swing axle, and engine/cylinders

When I first started out in this hobby, a constant dilemma was whether to paint the parts separately before assembling them or vice versa. In this case, I just decided on the former without too much thought and it seems to be turning out well. In fact, this could be a turning point for it's a lesson for me not to overthink things too much until inertia sets in. An example of this is my intended maiden Gundam project i.e. the RX-78-2 which lies dormant. The thought of having to figure out how to paint the many small parts individually before assembly has made the project a non-starter, for now. 

Reverse view of the piece showing (from top to bottom): oil strainer, swing axle and transmission
Engine grime gave the aluminum engine block a suitably weathered look
All these details painted just to be covered up ... why oh why do I put myself through this?
Ridged square piece containing a circular seal with six nuts is the oil strainer

Existence of seam lines of two interconnecting part is usually a bugbear of mine. It wasn't this time around because ... and it bears repeating ... most of these parts will eventually be hidden from view. In addition, the existence of injector pin marks on some of the parts meant they needed to be sanded down and smoothed out. Fortunately, not all of the parts required this extra, tedious step because some of the injector pin marks comprised surface areas where other parts will be glued onto.    

Engine oil effects were applied ... surprise, surprise ... on the oil strainer
Painted innards of the swing axle are already enclosed and hidden from view ...
... which begets the question, why paint the mid-section of the swing axle in the first place?
A typical detailed-oriented modeler's answer: Just because!
That piece propping up the engine at an angle (located at the bottom most part of the picture) looks like the carburetor

Tamiya's attention to detail means the Beetle engine is barely half-finished after Steps One and Two. There is still the fan housing, exhaust system, etc. to be assembled, painted, weathered and then attached to the existing piece. And  after that, there is the car interior to assemble and paint as well. So it'll be a while before Bumblebee's usual striking yellow on the car body even takes form. As with most of my projects, the journey is bound to be a long one. But at least it has begun.

https://www.facebook.com/FourEyedMonster-313145002078520/

https://shireworks.blogspot.com/https://www.facebook.com/shire.works
Related Posts Plugin for WordPress, Blogger...