Showing posts with label Ultramarines Troops. Show all posts

Wednesday, 28 August 2013

First look at Ax Faction miniatures

Way cool was the thought that immediately entered my head when I first laid eyes on an Ax Faction miniature featured at The Jolly Bodgers blog. That miniature was the Forsaken Princess aka Witch Hunter and I knew there and then I had to try painting her. Details on the Witch Hunter were simply mind boggling and the paint job by Avicenna was truly amazing.

Simple but effective packaging for Ax Faction miniatures

To start off my journey with Ax Faction miniatures, I will be working on Raen of Rannoch (Giant Hunter) and Jotnar's Bane (Troll Hunter). Both of these miniatures seem easier to assemble and paint. Later, I will be working on other Ax Faction miniatures including my favourite - the Witch Hunter.

Unboxing of the Giant Hunter and Troll Hunter

Both Raen and the Troll Hunter came with a double sided art card measuring approximately 15cm by 21cm (A5). One side contained art work while the other side had a brief description of the miniature.

Front (left) and back (right) of the Art Card supplied with Jotnar's Bane
Front (left) and back (right) of the Art Card supplied with Raen of Rannoch

Upon unboxing, my very first impression of Ax Faction was that they reminded me a lot of the Kingdom Death miniatures. Details on the Ax Faction resin miniatures were very impressive and assembly range from easy to intermediate difficulty in view some parts being fairly small.

Jotnar's Bane aka Troll Hunter and her resin parts
Raen of Rannoch aka Giant Hunter and her resin parts

So far, all I have managed to do is assemble both miniatures (combination of super glue and dry fitting). During assembly I couldn't help noticing the amount of details on the miniatures. Mould lines were minimal. While I detected some tiny bubble imperfections (none of which damaged the details), it was nothing some green stuff can't fix. I am so looking forward to painting Raen and Jotnar's Bane.

After assembly - Raen of Rannoch (front view)
After assembly - Raen of Rannoch (back view)

After assembly - Raen of Rannoch (base - giant footprint)

While I was washing the Troll Hunter and preparing her for assembly, I accidentally broke the tip of the small bird's wing. It was an utter noob mistake that resulted from me washing it too hard with a brush. Duh ... face palm. But as they say, a silver lining in every cloud and all that jazz. Because of my error, I had the opportunity to try and glue a very small part (less than 2 mm) back to the wing of the bird ... and I succeeded against all odds. It helped that the small broken piece was still attached to the sprue so that made things a whole lot easier. Certainly a hobby confidence booster! 

After assembly - Jotnar's Bane (front view)
After assembly - Jotnar's Bane (back view)
After assembly - Jotnar's Bane (side views)
After assembly - Jotnar's Bane (base - troll's head)

Actual size-wise, the Ax Faction miniatures are fairly similar to W40K minis although scale-wise the former is bigger at 32 mm versus 28 mm for W40K. That is why Raen's height is similar to that of the Ultramarine. Hypothetically, if both were at the same scale, the space marine would tower over Raen.

Raen shown here next to the very first miniature I ever painted

This concludes my initial look at the Ax Faction miniatures. Thanks for reading and stay safe.


Friday, 3 May 2013

Word Bearers Helbrute in a mini-diorama

After spending more than a month on the Helbrute, I have finally finished painting it ... at least I think I have. Some issues such as planning a mini-diorama in the Helbrute's base; incorporating the four Chaos gods' influence; doing some basic object source lighting as well as some repainting of the armour to show more depth resulted in this project taking longer than it should. And to add to my woes, I had to take about 150 over shots with various camera settings and lighting configurations (the Helbrute was too reflective but that's a story for another day) before I got the photos I wanted.

Word Bearers Helbrute and a warrior of Guilliman
Are you talking to me?
Side view (right) of the Word Bearers Helbrute
OSL effect from the vents is most obvious from this angle
Back view of the Helbrute with the Ultramarine's back armour on the ground
Initially I wanted to put a Space Marine head trophy at the end of the left arm's chain
Side view (left) of the Word Bearers Helbrute
From here you can see that the Ultramarine's line of sight is facing the Helbrute's face

I might still do some touch-ups/repaints later once I have had a fews days of looking over it. Overall, I believe I have done just about the best I could based on my current painting skill level. There are so many other painting techniques that I want to learn and utilise. I am taking stock of my shortcomings by doing plenty of soul searching as to the things I am doing wrong as well as the things that I am neglecting due to lack of patience, some of which I will write about and address in future posts.

Side view of the mini-diorama
Close up of the dying Ultramarine
Ripped off his back, the Ultramarine's back armour lies on the ground

I was very unhappy with my Dark Apostle which I completed previously as I thought I did some sloppy and lazy work which resulted in the armour looking very flat. I did the best repair job I could by painting in several layers of varying ratios of Red Gore:Blood Red.

My version of Marduk and the Warmonger (of the Black Library Word Bearers trilogy fame)
Back view of the Word Bearers Dark Apostle and Helbrute

With such a long time spent on my Word Beares army so far, my 2Q 2013 hobby schedule is dead on the water. While I am suppose to paint my Black Legion army concurrently, for some reason, I am not quite looking forward to it. I am contemplating taking a break from painting an army for gaming and re-starting my diorama project involving a Lord of the Rings Dragon and a Kingdom Death miniature, which will give me more opportunities to try out new painting techniques and improve myself. As always, thanks for reading and may your brushes stay pointy.


Tuesday, 23 April 2013

Miniature conversion using green stuff

Woo-hoo ... I managed to finally complete my first miniature conversion as well as use Game Workshop's green stuff for the very first time. Taking them for what they are i.e. maiden attempts, I am fairly happy with the results and it gives me the confidence to do better next time. As a start, I decided to try something not too ambitious and limited my conversions to simple modifications. For now, I plan to place this fallen Ultramarine on the same base as the Word Bearers Helbrute that I am painting.

No guts no glory - intestines were sculpted in a slightly enlarged size to simulate bloating (Nurgle at work here)
Realised that I had no decals for the Ultramaring tactical symbol so that had to be drawn free-hand
Shot through the primary heart while armour show signs of battle damage

Why a fallen Ultramarine for the mini-conversion project?
Well, the idea behind this mini-conversion was to have a victim for my Word Bearers Helbrute and what better Adeptus Astartes chapter to use than the Ultramarines. Granted that the Helbrute is carrying a multi-melta but the story behind the unfortunate soldier is that he was shot through his primary heart by a Word Bearers Space Marine and as his secondary heart tried to cope, he lay down on the rocks to recover. Who happens to trudge by but a Helbrute who decides to gut him with his power first. So there you have it, a fallen Ultramarine who is at death's door (if not through it).

This particular Ultramarine's blue armour is slightly darker than what I usually paint my boys in blue - the direct result of having a heavy wash of Badab Black to portray a battle-worn armour. Other battle damage effects that I tried to include were scratch marks from bolter rounds and blood splatter. His head is not totally inclined as his secondary heart has not completely given in yet.

First try at using Green Stuff
A warm-up before sculpting the actual green stuff
As this was my first experience at using the green stuff, I decided to practice first by using a rubber mastic adhesive or more commonly known as Blu-Tack. In this case, I used Selley's Ezy-Tack which was white instead of the traditional pale blue colour. I guess the muscle memory gained from a childhood spent playing plasticine was still intact as I managed to shape the re-usable adhesive without fumbling too much. For this project, I used the smallest sculpting tool in my set of cheap plastic tools.  

Green stuff for miniature conversion
Of course the adhesive is different from the green stuff in two key areas:
(a) It is less sticky; and
(b) It is softer than the green stuff. 

Nonetheless, it gave me the chance to test out my ideas before settling on the final result that you see on the left i.e. some leg armour to reposition the foot; some bloated intestines and the stump of his torn-off arm.

Based on my experience, the biggest thing to note about using the green stuff is to always keep it moist while sculpting. Don't worry about getting it too wet, just keep dabbing water on the green stuff as you sculpt to prevent them from sticking to your hands.  

Just to be sure, I left the green stuff to cure over night before spraying a white undercoat on the whole miniature prior to painting it. Well that's it for this post, thanks for reading and happy hobbying!

Thursday, 9 February 2012

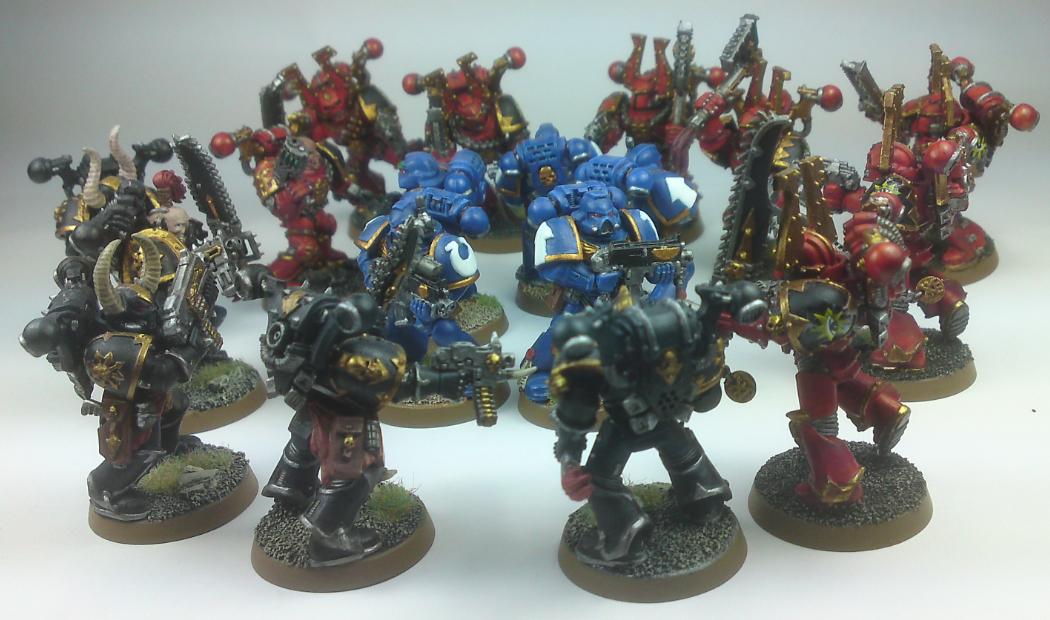
Khorne Berzerkers are ready for war!

After what seems like forever, the Khorne Berzerkers are finally finished. Highlights comprised Blood Red for the armour, Chainmail for the metal parts and Burnished Gold for the gold parts. Weapon tassels were washed with Thraka Green (on top of a Mechrite Red basecoat) and highlighted with a mixture of 1:3 Scab Red:Fortress Grey. Basing was inspired by GameWorkshop's Warptainted Lands colour scheme while a Black Legion decal was applied to the zerkers' left shoulder.


Can the zerkers be improved upon? Most undoubtedly. But for now, I guess I will leave them as they are. A wash of Devlan Mud was in the works but I decided against it at the end. A detailed 'How to paint Khorne Berzerkers' as well as colours used for the base will be posted in an upcoming blog. 

View from all angles
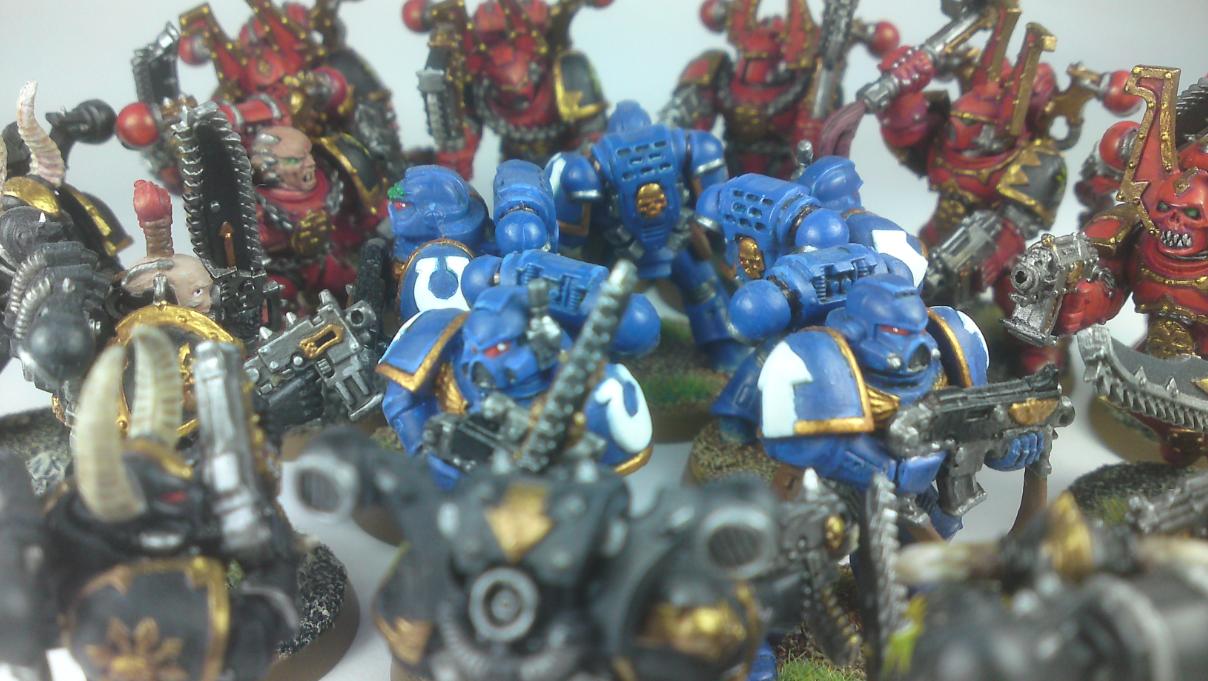
A detailed look
 With these new additions, the Black Legion army was soon looking for trouble. 

Courage and honour?


Ugg and Ogg in trouble?

Well, based on that last picture above, it seems like the lovable Ugg and Ogg  are in serious trouble. They need help. So I will need to start my Citadel Finecast project soon and get Ghazghkull Thraka into the fray. I plan to use 'Heavy Metal's Masterclass guide to help paint this massive Ork Warboss. 


It has been a crazy week hobby wise ... but I am loving every minute of it.

Tuesday, 11 October 2011

The first step

As the old saying goes, a thousand miles begins with a single step. Having finally taken the plunge into the the world that is Warhammer 40K, I must say I am enjoying the hobby greatly. I ain't no spring chicken, in fact I will be approaching my own mid-life crisis of sorts soon, but I say one is never too old to have a hobby involving miniatures. Kudos to Games Workshop and the Black Libray for having created such a wonderful world where there is only war.

Its only fitting that my very first miniatures be the Ultramarines. They are the first miniatures I have ever painted in my life so there is plenty of room for improvement.


Currently, I am also in the midst of painting two ork boyz. I have only managed basecoats and a wash. I have yet to paint the various layers of skin, armour etc as well as highlights, so more updates on that later.


These miniatures were suppose to be a practice run for me before I started painting an Assault on Black Reach (AOBR) set that I got for me and my son. But things don't always go as plan. I have been hijacked by the call of Chaos. Project AOBR is now officially on hold as I begin down the path of damnation.  =)  I will be posting progress updates on my Black Legion army as the days roll by ... feel free to comment and provide tips for this old dog thats trying to learn new tricks.
Related Posts Plugin for WordPress, Blogger...