With this Evangelion project being a straight out-of-box (OOB) build, the need for painting is alleviated. This has translated into a more fun build in some ways. Perhaps it'll not be ultimately as satisfying as a painted build, but it'll still be fun in a relatively less stressful way. This is not to say absolutely no work will be done on this Bandai Real Grade Evangelion Unit-00 model kit. It'll be panel-lined, and have selected marking/foil stickers applied. But that's it. Nothing else.
.jpg) |
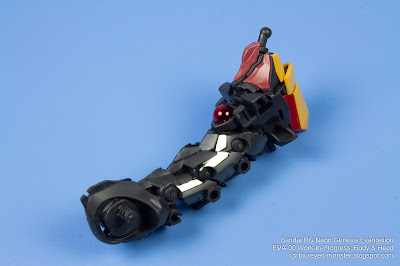
Bandai Real Grade Evangelion Unit-00 work-in-progress: Body & Head assembled
|
.jpg) |
Apart from assembly, the only other work done was to put foil stickers on the inner frame
|
Assembly began on the inner frame for the Evangelion's torso, all the way from its neck down to the pelvis. Incredible detail coupled with its combination of matte (for majority of the surface area) and shiny (for selected areas courtesy of foil stickers) finishes, the inner frame looks suitably cyborg-like. This is fitting as Evangelion units are essentially living organic creatures with cybernetic components grafted onto them. And all this impressive detail won't be lost once the outer armor is attached because significant gaps between the armor allow a view into the Evangelion's innards.
.jpg) |
Early stages saw the Evangelion Unit-00 inner frame, and its neck region, assembled first
|
.jpg) |
Shiny bits on the inner frame consist of metallic foil stickers that reflect light
|
.jpg) |
Inner frame of the Evangelion Unit-00 with the back spinal column exposed
|
.jpg) |
Evangelion Core is represented by a clear round red piece within the chest cavity
|
.jpg) |
Lower section of inner frame with the slim pelvis, onto which the legs will attach
|
From the photos above, you might've noticed that the yellow armor pieces on the back of the Evangelion's neck has already been attached, as has its reddish-brown neck parts. Following this, the upper chest/back was next in the assembly process. This upper torso section comprised yellow, white, and black pieces for the front; yellow, black, and reddish-brown for the back (see below).
.jpg) |
Chest/back armor pieces were next to be assembled, after the spinal/pelvic inner frame
|
.jpg) |
Chest armor (front view) located right below the Evangelion's neck (reddish brown section)
|
.jpg) |
Neck, chest, and upper spinal column (closeup isometric view, front)
|
.jpg) |
| Neck, chest, and upper spinal column (closeup isometric view, back) |
.jpg) |
Upper back armor is situated below back of the neck region (yellow/red section above the arm joints)
|
.jpg) |
Reddish brown section on the back forms a connection point for the power plug
|
After the upper torso armor had been securely attached onto the inner frame, it was then the turn of the lower torso armor pieces. As alluded to earlier, the lower torso armor pieces attach in way that leaves significant gaps between segments and at the back of the spine. This then allows the detailed inner frame to be visible after all outer armor pieces are in place on the torso (see below). In many Gunpla kits, the intricate inner frame detail tends to be completely covered up by outer armor. Thankfully this is not so for Bandai's Neon Genesis Evangelion model kit series.
.jpg) |
At this stage, assembled pieces comprised the neck, chest/back armor, spinal column, and pelvis
|
.jpg) |
A myriad of points on the spinal column serve as attachment points for the rest of its armor pieces
|
.jpg) |
Neck, chest/back armor, spinal column, and pelvis sub-assembly prior to attaching rest of its armor
|
.jpg) |
| Neck, chest/back armor, spinal column, and pelvis sub-assembly after attaching rest of its armor |
.jpg) |
Of all the yellow armor pieces, the ones on the back of the EVA's neck and its upper back are the ...
|
.jpg) |
... most glossy and vivid in color, thus they look more plasticky compared to the other yellow parts.
|
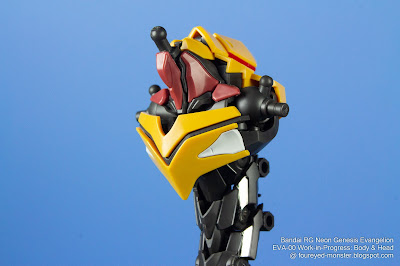
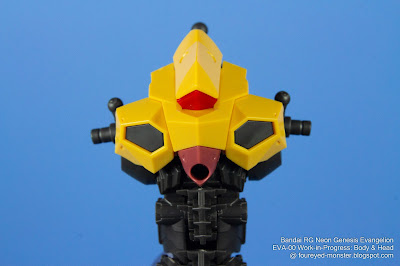
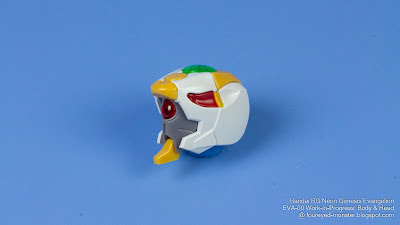
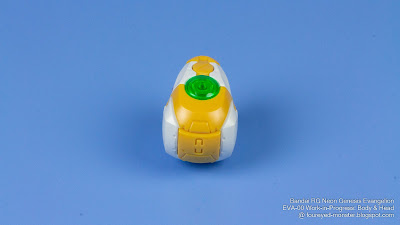
Meanwhile, the Evangelion's head was a relatively easier affair in that there were less pieces to contend with. For a part so small, the color separation is fantastic, and a dream to hobbyists who don't paint their kits. However, I would recommend that you at least panel-line the head with a combination of black and grey paint. There are enough grooves and raised edges to ensure that panel-lining will effectively increase the sense of depth and detail on the head. The clear green piece atop the head and the clear red mono-eye (a characteristic of EVA Unit-00) look good as is, and can be potentially better in the hands of modellers with LED lighting skills.
.jpg) |
Bandai Real Grade Evangelion Unit-00 work-in-progress: Head [OOB Assembly]
|
.jpg) |
Round red clear part at the front of the head forms the Evangelion's mono-eye
|
.jpg) |
Color separation found on the Evangelion's head is amazing for a part so small
|
.jpg) |
Minor panel-lining work will be carried out to increase a sense of depth on the Evangelion's head
|
.jpg) |
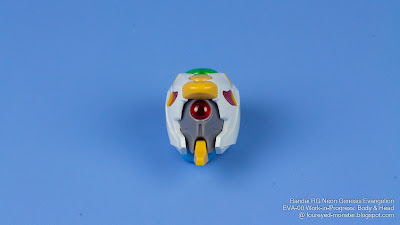
Back of the head has grooves indicating the unit number, which will become clear once panel-lined
|
.jpg) |
Apart from the mono-eye, the other clear part is a green piece that sits atop the Evangelion's head
|
So the core section of Evangelion Unit-00 i.e. its head and torso have been assembled. Next on the to-do-list for this kit is the assembly of its limbs consisting of the shoulder pylons, arms, and legs. And as I upload posts on the blog regarding Evangelion Unit-00's work-in-progress, I will also be uploading a three-part video series detailing the unboxing of this model kit all the way to assembly completion, kit poses and review. It's likely the videos will be ahead in the progress timeline compared to the blog posts, so if you're impatient to check out what's new, do watch the videos on my YouTube Channel by clicking on the teal-colored banner immediately below this paragraph. With that I bid you au revoir.
Note: Not all the Bandai Real Grade Evangelion Unit-00 video parts may have been uploaded at the time of this blog posting. The missing part should be uploaded in the coming weeks.

.jpg)
.jpg)
.jpg)
.jpg)
.jpg)
.jpg)
.jpg)
.jpg)
.jpg)
.jpg)
.jpg)
.jpg)
.jpg)
.jpg)
.jpg)
.jpg)
.jpg)
.jpg)
.jpg)
.jpg)
.jpg)
.jpg)
.jpg)
.jpg)
.jpg)


Amazing details!
ReplyDeleteModel kits from the Real Grade line are usually chock full of amazing details.
DeleteGreat work Kuan ! Looking forward to see more progress.
ReplyDeleteGreetings
Thank you Mario. More progress coming very soon.
DeleteGreat looking progress Kuan!
ReplyDeleteBest regards
Thank you very much Michal.
DeleteOnce again everything is marvellous. What amount of work and dedication! :O
ReplyDeleteYou're too kind Suber :) As an OOB build, everthing is pretty straightforward for this kit. But future Real Grade kits may be painted and those will involve tons of work for sure :(
Delete