Having sorted out all the mislabeled and misplaced parts of my
Bandai 1/144 scale Millennium Falcon project, I am now able to go full speed ahead with a focused aim of completing of this iconic Star Wars ship. This task began with the assembly, painting, and weathering of the ship's side hulls, escape pods as well as exposed lower hull innards. All had required lots of work at the assembly stage because each individual section started off as separate pieces which would then go on to combine into a bigger whole (
shown in the following photos except of side hulls).
 |
| Bandai 1/144 scale Millennium Falcon port side hull including escape pod (circular structure) |
 |
| Millennium Falcon starboard side hull including escape pod (circular structure) |
 |
| Exposed innards on the front right quadrant of the Millennium Falcon's lower hull |
 |
| On the opposite side of the Millennium Falcon's lower hull is a mirror image of exposed innards |
Apart from these three main sections - i.e. the side hulls, escape pods and exposed innards of the lower hull - I also attached a previously completed
Lower Laser Turret as well as front nose section onto the lower hull (
see two photos immediately below). And for the former, if you look really, really closely you might just catch a glimpse of Finn seated on the gunner's seat.
 |
| Nose section that's located in between the future positions of both forward mandibles |
 |
| Look closely and you'll see Finn seated inside the laser turret (sans quad cannons) on the lower hull |
As mentioned earlier, there was actually two parts to the exposed innards. This is an ingenious design that achieves a realistic end results of three dimensional depth and detail. As it is the individual parts are all already excellently molded with fantastic details. So to have an added 'depth factor' certainly ups the realism factor. This design was also used on the side hulls (
not shown) and escape pods (
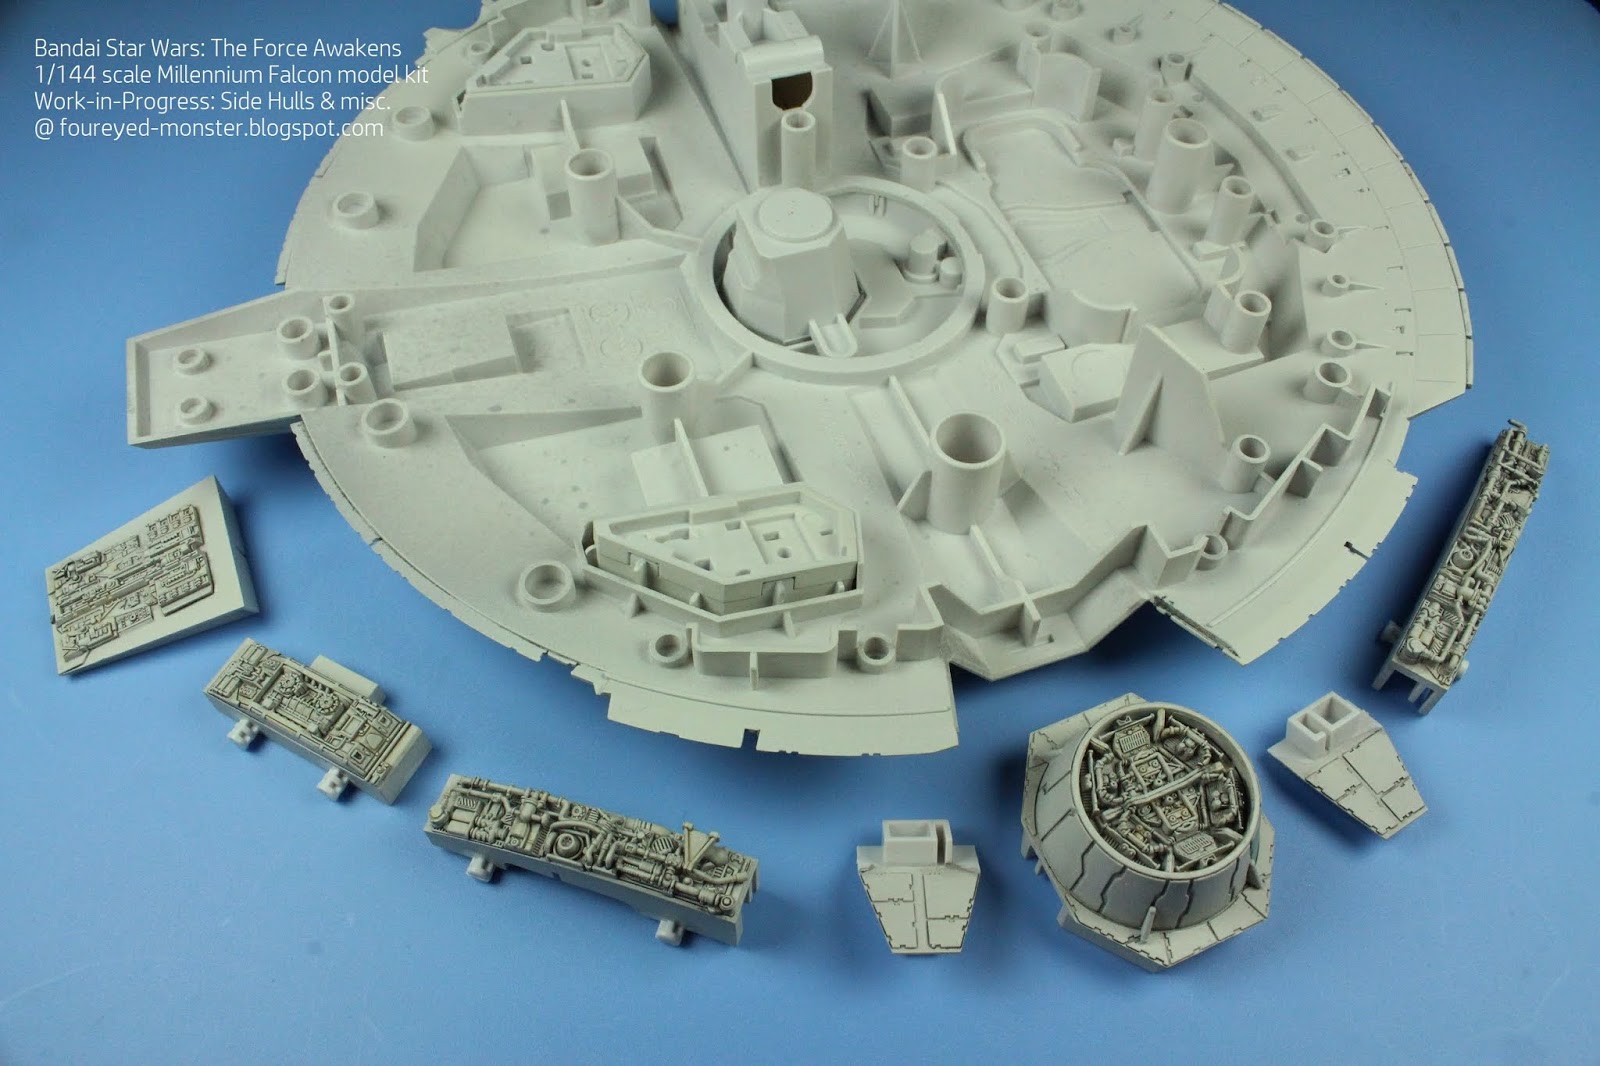
see photos of the starboard side escape pod assembly). The only negative to this design is the frailty of parts that form the outer shell, especially on the side hulls. When full assembly of the Falcon itself is underway, it'll be important to handle these 'two-part' pieces with care lest I break them.
 |
| Clockwise from top right: pieces of the port side hull, exposed innards, nose section and escape pod |
 |
| Mirror image pieces of the exposed innards actually come in two separate sections |
 |
| Combined together, the separate sections of exposed innards showcase an impressive level of depth |
 |
| Sections of the exposed innards prior to being attached into the Millennium Falcon's lower hull |
 |
| Both the mirror image exposed innards after being attached into the lower hull |
On the port side of the Falcon's side hull, the various components comprising the nose section, side hull and escape pod attached to the lower hull without any fuss. It snap-fitted so securely that no glue was required to ensure the pieces fit together properly. This was even before the upper hull had been attached on top of the said components, which will further secure all the pieces together.
 |
| Pieces comprising the nose section and port side components of the Millennium Falcon's side hull |
 |
| Millennium Falcon lower hull's nose section, port side, and escape pods attached and assembled |
Over at the starboard side, I was able to show the escape pod in its original two-piece-setup (
see below). Like the side hulls and exposed innards before it, the escape pod benefited greatly from this design in terms of an increase in three dimensional depth and end result realism. With the exception of one of the side hull pieces near the nose section (i.e. half of it was smooth with no details in order to accommodate the cockpit later), the starboard side is almost identical to the port side hull.
 |
| Components of starboard side of the Millennium Falcon's hull (note escape pod is in two separate pieces) |
 |
| Said starboard side hull components just before they are attached to the lower hull |
 |
| Starboard side of the Millennium Falcon side hull (fully assembled and attached to lower hull) |
So the sides and lower hull of the Millennium Falcon are largely completed. That leaves the Upper Hull, Cockpit, Forward Mandibles, Sublight Drive Exhaust, Upper Exposed Innards, Radar Dish and Upper Laser Turret on the to-do-list. And if you had been following the progress of the project way back when, you would note that the first three items in the list have already been completed sans weathering. So that leaves just the latter four items to be primed, painted and assembled. Once all the items have been ticked off, there is still the weathering to do
and the final assembly process.
 |
| Millennium Falcon work-in-progress: side hulls, escape pods, nose section, exposed innards and turret on lower hull |
In addition to all the sections mentioned above, the Lower Hull also needs to be weathered. My first attempts at weathering the Falcon will actually begin on this lower section because any mistakes won't be as visible compared with the upper section. Subsequently, any hard lessons learned while weathering the Lower Hull/Lower Laser Turret will then be used to weather the Upper Hull, Upper Laser Turret, Cockpit, Radar Dish, and Forward Mandibles. Only after this can the final assembly process begin. And while there is still a ways to go, the Millennium Falcon project has finally reached critical mass and I'm now confident it'll be completed ... sooner rather than later.


.jpg)

Ahhh! The legend starship! Waiting for more :)
ReplyDeleteLegend indeed. Thanks Michal :)
DeleteSo good! Always my favourite craft in the films.
ReplyDeleteA great contender for best ship in Star Wars, that's for sure.
DeleteSplendid and realistic, most impressive details!
ReplyDeletelol i had no scale ref until that last shot and i was like what a huge undertaking - oh
ReplyDeleteEven at 1/144 it's rather quite big, that much I agree :)
DeleteThat's so mesmerizing :O
ReplyDeleteI'm making space ships noises now! I'm blaming you!
Pew! Pew! Pew! Well make sure you aren't too loud or your neighbors will think the COVID-19 lockdown has driven you crazy ;) :)
DeleteSuch details, beautiful!
ReplyDeleteYes I agree. Bandai did an excellent job molding all the details into this kit.
Delete