So when am I going to airbrush something other than a plastic spoon? Forgive this old dog and his new tricks but I'm getting there, slowly. In fact, I've taken a big step by setting up an airbrush spray booth to ensure a less toxic painting environment. Retailing for RM420, the
HSeng Spray Booth with LED Light (Model: HS-E420DCLK) isn't overly expensive but it's still a big investment for most modellers to make. Having bided my time in order to secure the best possible deal, I finally took the plunge and bought one at a local hobby store sale for 20% off. So starting now, a huge obstacle to regular airbrushing sessions - i.e. overexposure to paint/thinner fumes - have been overcome.
 |
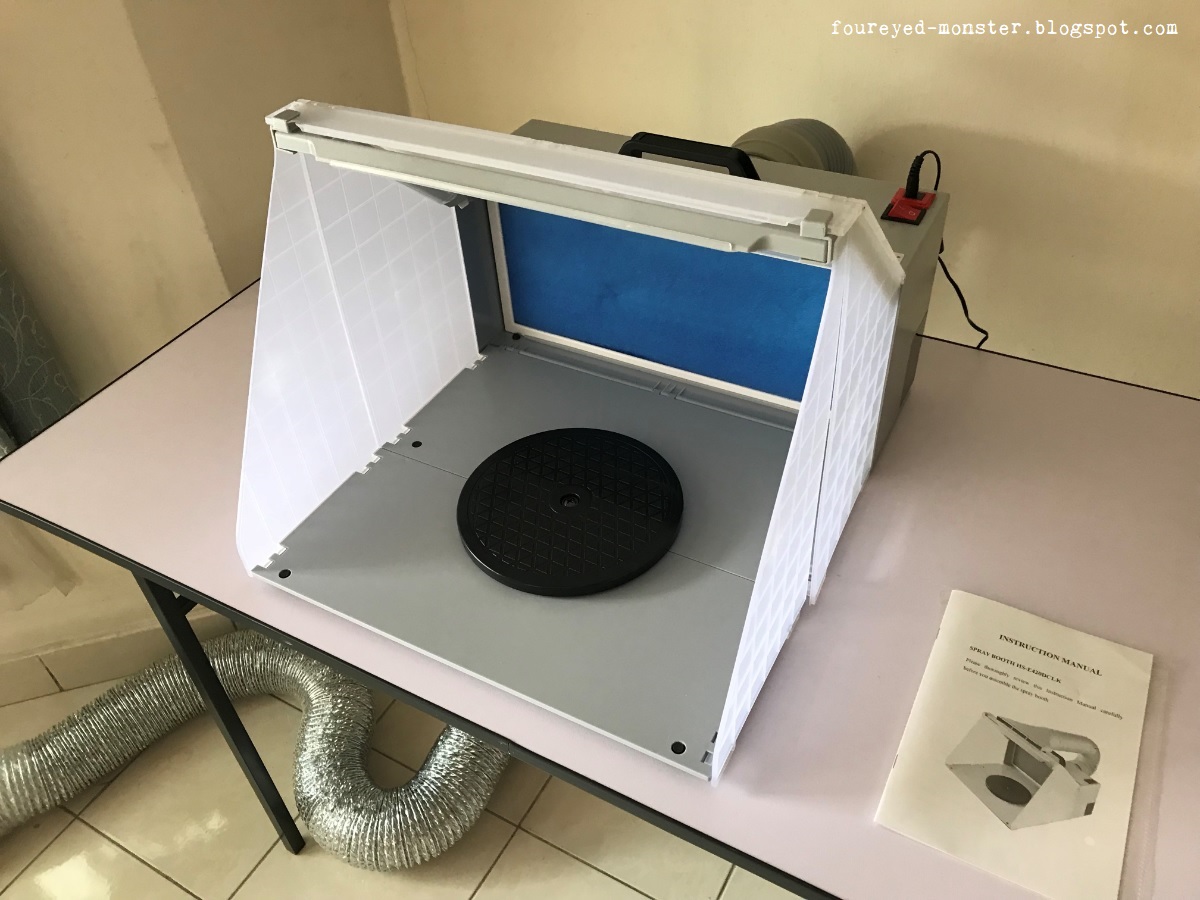
| An airbrush spray booth at last ... yet another item ticked off in my things-to-get-before-airbrushing-actual models |
 |
| HSeng Spray Booth with LED Light (model HS-E420DCLK) obtained during a recent sale at my local hobby shop |
This particular spray booth model conveniently comes with its own LED lights. While it's possible to set up a separate lighting system using IKEA work lamps, the existence of internal LED strip lights allows for a less cluttered work environment. And because the spray booth is designed to be portable, the LED strip lights can actually be detached and disassembled into three separate pieces. Apart from portability, this just means you can choose to disable the internal lighting if you so choose.
 |
| My airbrush spray booth setup inclusive of a cheap do-it-yourself exhaust hose extension |
 |
| When the airbrush spray booth is switched on, both the LED lights and suction fans will come online together |
Also included in this spray booth model is an exhaust duct system that serves to channel air - that is being sucked from the spray booth - away from the immediate area. There was, however, one DIY modification I had to make before the system could be of any use to me. The issue stemmed from the length of plastic hose provided which wasn't long enough for my purpose. To rectify this, I purchased a flexible aluminium foil hose from the local hardware shop in order to extend the overall length of the exhaust duct system. The ends where aluminium foil met plastic was secured using cling wrap.
 |
| Gray plastic exhaust hose came with the booth while the shiny aluminum foil extension was obtained separately |
In yet another nice touch, this spray booth model came with a round black plastic turntable roughly 192 mm in diameter. This should be useful especially when priming or when painting large surface areas in a single color as each part of the model kit can be exposed to paint just by spinning the turntable. In keeping with the booth's portable design, the turntable isn't fixed rigidly to it. Instead, the turntable is a separate piece that sits securely in place thanks to rubber-like tabs underneath it.
 |
| A small black turntable is included as an accessory to the spray booth |
 |
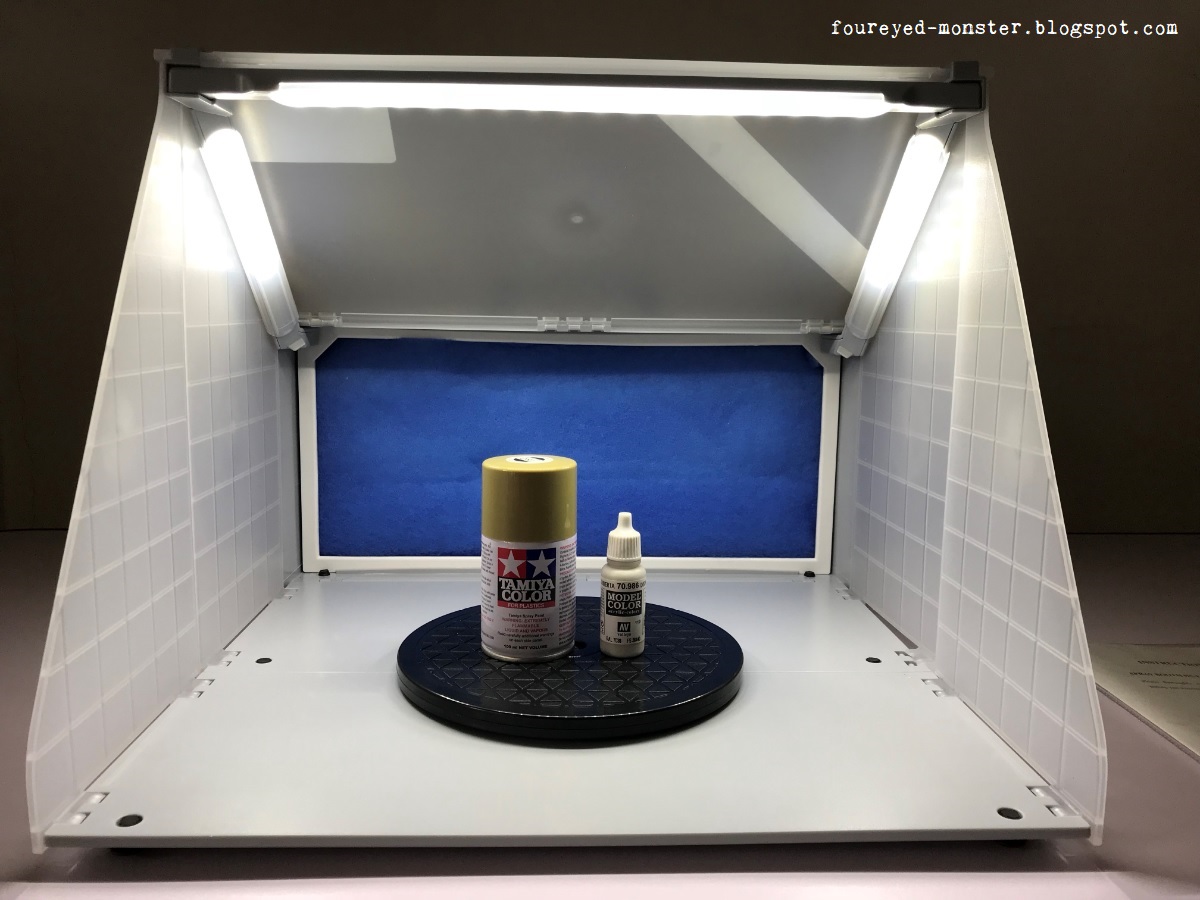
| Spray booth with all three of its LED lighting bars swtiched on |
 |
| A 100 ml Tamiya spray can and a 17 ml Vallejo Model Color paint bottle are used as a scale comparison |
To keep things tidy and clean, I layered the spray booth's lower section with some plain white A3 paper. Disposable and easily replaced, the papers help to collect most of the paint overspray as well as prevent heavy buildup of paint on the inner walls of the spray booth.
 |
| Pieces of white paper form disposable protective layers to prevent buildup of paint on the spray booth |
Noise level specified in the instruction booklet at maxing at 47 dB, supposedly similar to the sound level generated by the air compressor. But this can't be right because the noise generated by the spray booth is rather loud and easily drowned out the noise emitting from the air compressor. Below is a quick one minute YouTube video showing the noise level generated by the spray booth.
In a quick test run, black primer - in this case
Mr Hobby Mr Finishing Surfacer 1500 Black diluted with
Mr Color Leveling Thinner in a 50:50 ratio - was used to prime and preshade some plastic spoons. Thankfully, the spray booth worked like a charm with paint overspray effectively eliminated by the filter and suction fans. All in all I was very please with the performance of this spray booth. In fact, the only negative I can think of is the noise generated by the booth. While barely noticing the sound when I was deeply focused on airbrushing, it's still loud enough to be irritating to some.
 |
| Airbrush spray booth worked like a charm when a test run involving black primer was carried out |
With the spray booth having passed the test run with relatively flying colors, the path to more regular airbrushing sessions is now open. Actually not quite. With my existing equipment, airbrushing AFV or Sci-fi kits shouldn't be much of an issue going forward. But that's not the case for resin miniature figurines. These require a finesse in paint application that my cheap low-end airbrushes can't provide. So I got myself a mid-range airbrush, for use especially when painting skin tones. I'll do a review of the said airbrush and then the pandora box of airbrushing will finally be opened for good.


.jpg)

Nice set up, cover those lights with some baking paper so they don't get covered in over spray, but still let light thru :)
ReplyDeleteOh ... thanks for the tip, I'll be sure to do that :)
DeleteThank You for review sir!
ReplyDeleteYou're more than welcome Michał :)
DeleteI literally just got a spray booth in this week, it may be the same as yours! It's going to be a life saver for me, I get annoyed at setting up my station every time I need to airbrush.
ReplyDeleteMine is set up on a collapsible table so everything can be disassembled and stored away. But for now I'll be leaving things as they are because I agree that having to set up the spray booth every time you use it can be annoying.
DeleteThat's am impressive piece of kit!
ReplyDeleteWhat's great is that it was purchased at a good deal. :)
DeleteGreat set-up ! I'm looking forward to see more airbrush related posts.
ReplyDeleteGreetings
Thanks! I certainly hope to be airbrushing more often now.
DeleteSweet looking setup!
ReplyDeleteThanks Simon :)
DeleteNice! Now looking forward to see the results of using it!
ReplyDeleteMe too ... heh heh ... I'm running out of excuses to delay my first airbrushing session on an actual model. So afraid I'll mess everything up ^_^
Delete