Just a quick update before Threepio is put together. It's always tempting to quickly finish up a model kit as it nears the end of its build cycle. Having spend so much time working on the same model kit, I guess it's only natural to crave for something new to get creative juices flowing again. So I took a deep breath, shifted down a few gears and patiently worked on the protocol doid's arms and legs. Uniformity was key for his arms and legs to blend in seamlessly with the rest of his body. A long enough time had lapsed in between work on C-3PO that some technique inconsistencies could arise.
 |
| Bandai Star Wars 1/12 Scale C-3PO: work-in-progress on his arms and legs |
Minor subtleties in technique application such as misremembering what paint:solvent ratio to use; how much pressure to apply; etc. can sometimes be a factor when one forgets to jot down the details earlier and when not enough muscle memory has formed especially for new techniques. Speaking of which, I painted Threepio's palms even though relevant decals had been provided. It just didn't make sense to use decals their 'look' would have been incongruent with the shiny gold plating. Painting the surface of his palms in matt black hues also made the gold-painted nodes stand out more.
 |
| Everything on Threepio's open palm was painted i.e. the gold nodes and black coating |
Options were available to make Threepio's arms either static or movable. Tiny parts (
see below) representing the droid's
intermotor actuating couplers allowed for simple extending movements in both arms. Originally, these parts was moulded in an ugly mustard yellow which looks completely out of place on the shiny gold plating. Solution? Paint them metallic gold and finish with a wash.
 |
| Components which allow for movable arms on Threepio |
 |
| Threepio's intermotor actuating couplers were repainted in gold vs the sprue's original ugly mustard yellow |
 |
| Threepio's left/right arm options (movable and rigid) as well as shoulder joints |
Depending on the type of paint used, the final level of gloss can differ. In my case, I used
Vallejo Model Color Old Gold and
Gold as
well as a black acrylic wash. It resulted in an overly weathered and
dulled down metallic look that I didn't care for. So the final built
will instead make use of the non-movable version of his arms for a more uniform look. The static arm version has gold plated
intermotor actuating couplers already moulded rigidly onto the upper and lower arms thus connecting them in a fixed position. Matching paints to the gold plating was always going to be a tough ask so
Bandai could've at least moulded the movable connectors in gold plating.
 |
| Outer part of Threepio's legs were weathered with oil-based paints and a semi-gloss clear coat |
 |
| Shown here are the inner parts of both the protocol droid's legs |
Although I usually take photographs of my miniatures/model kits using a black background, this was the first time I was doing so for the
Bandai Star Wars 1/12 scale C-3PO model kit. Reflective surfaces don't play well with dark surfaces as they tend to reflect their surroundings. So that means Bandai's
product photos of C-3PO were either taken against a black background using high-end photography lighting or taken against a white background and digitally edited onto a black one. Wouldn't I love to be a fly on the wall on Bandai's official product photography session of C-3PO.
 |
| Threepio with his detached arms and legs, this time against a white background |
 |
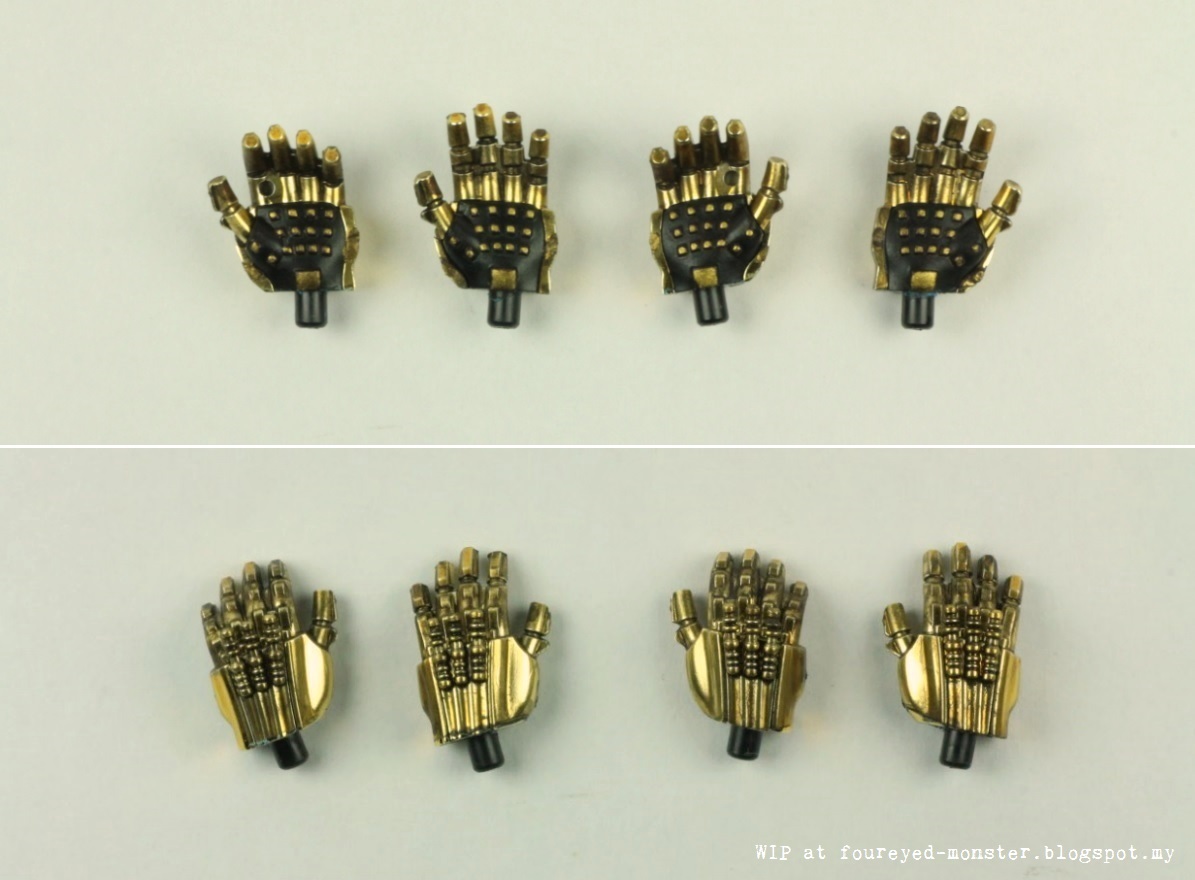
| Both the left and right hands have two options each: open palm and slightly clenched |
 |
| Two different viewing angles of Threepio's arms against a white background |
 |
| Silver-plating on Threepio's lower right leg is 100% movie accurate |
So Threepio is essentially done. All there is left for me to do is put him back together albeit better than how Chewbacca did in
Empire Strikes Back. Chances of Threepio being completed by next week are definitely higher than his oft quoted
725 ... to one odds. Until then, be well and be happy!


.jpg)

I dont know how you do this, but You're rock! Amazing work! May the force be with You!
ReplyDeleteThank you very much Michał. Very kind of you! :)
DeleteThe level of detail is absolutely wonderful, outstanding job Sir.
ReplyDeleteMany thanks Michael. This is an excellent model kit on which Bandai has done a great job moulding.
DeleteAwesome work all around, as alwasy. :)
ReplyDeleteVery kind of you. Thank you :)
DeleteJust perfect, just perfect!
ReplyDeletewonderful color, you are doing a great job!
ReplyDeleteThat gold plating color came with the sprues. But they do have to be weathered with oil-based paints so as to lose their toy-like plasticky look.
DeleteYou are going to need C3PO to translate into over 6 million forms of communication how awesome this project is. Truly fantastic.
ReplyDeleteYour sir are too kind. Thank you very much. ^_^
Delete