Wednesday, 13 September 2017

Star Wars Snowspeeder [WIP - Upper and Lower Hull]

After detailed work on snowspeeder pilots Wedge Antilles and Wes Janson, it was time to move on to the vehicle's bare upper and lower hulls. Before any weathering effects are attempted, however, my plan is to first give the entire snowspeeder a simple off-white basecoat, orange stripes and black-grey panel lining. All the separate pieces will then be assembled together for the final weathering process. First things first though. It's always important to get the basics right first. And for the Rebel Alliance snowspeeder this meant getting the proper hues for its entire hull.    

Bandai Star Wars 1/48 scale Snowspeeder, work-in-progress on the upper and lower hulls
Orange hues on the Snowspeeder hull are much redder than the pilots' flight suits
Effect of chipping fluids on brush-on acrylic paints, after either a 30 minutes or 18 hours drying time

Each modeller will have his or her interpretation of what is considered a movie-accurate hue for a particular Star Wars vehicle. This is complicated somewhat by the fact that colours behave differently at different scales. While there are after market paints which claim to have recipes closely resembling actual mixes used in the movies, I simply chose paint colours that I judge to be close enough. In this case, I used the Tamiya AS-20 Insignia White (US Navy) for the primary hue on the hull. As for the orange stripes, I used a 8:2 ratio of Vallejo Model Color Clear Orange and Carmine Red.

Bandai's plastic was given a primer, basecoat and clear coat to protect it from subsequent enamel-based weathering
Lower hull after a basecoat of Tamiya AS-20 Insignia White (US Navy) and a layer of Gloss Clear Coat
Bandai plastic is susceptible to cracking when coming in contact with enamel-based products so tread lightly
Lower hull after panel lining with a 2:1 mixture of black and grey Tamiya Panel Line Accent Color
Upper hull after panel lining with a 2:1 mixture of black and grey Tamiya Panel Line Accent Color

Prior to applying panel lining, a clear coat (Tamiya TS-13) was sprayed on to protect the underlying paint as well as the notoriously weak Bandai plastic. Based on previous experience, any form of oil/enamel solvents will likely cause its plastic to become brittle and crack. It was only once the clear coat had dried overnight before I proceeded to apply a 2:1 mixture of the Tamiya Panel Line Accent Colors Black and Grey. Even then care should be taken not to over expose the plastic to enamel thinners which are used primarily to clean up excess panel lining.   

Tamiya Masking Tape is a great product which is gentle on the underlying paint layers
Masking tape was used to delineate the orange areas
Reddish orange will be painted within the area masked off by the tape
Even on the smallest areas, masking tape was used to ensure a clean edge

Subsequently, the reddish orange stripes were painted onto the upper and lower hulls. Even though I was hand-painting it with a brush, it still helped to first mask out the areas so that the stripes would look clean and straight. After a series of tests (see third photo above), I settled on using a combination of AK Interactive Worn Effects and 

Vallejo Model Color acrylic paints are used in combination with AK Worn Effects for a chipped paint effect
Snowspeeder orange is an 8:2 mixture of Vallejo Model Color Clear Orange and Carmine Red
 The acrylic paint was painted over a layer of AK Worn Effects which had dried over a period of about 30 minutes 
After the paint had dried overnight, a chipped paint effect was created using wet, hard brushes and a toothpick

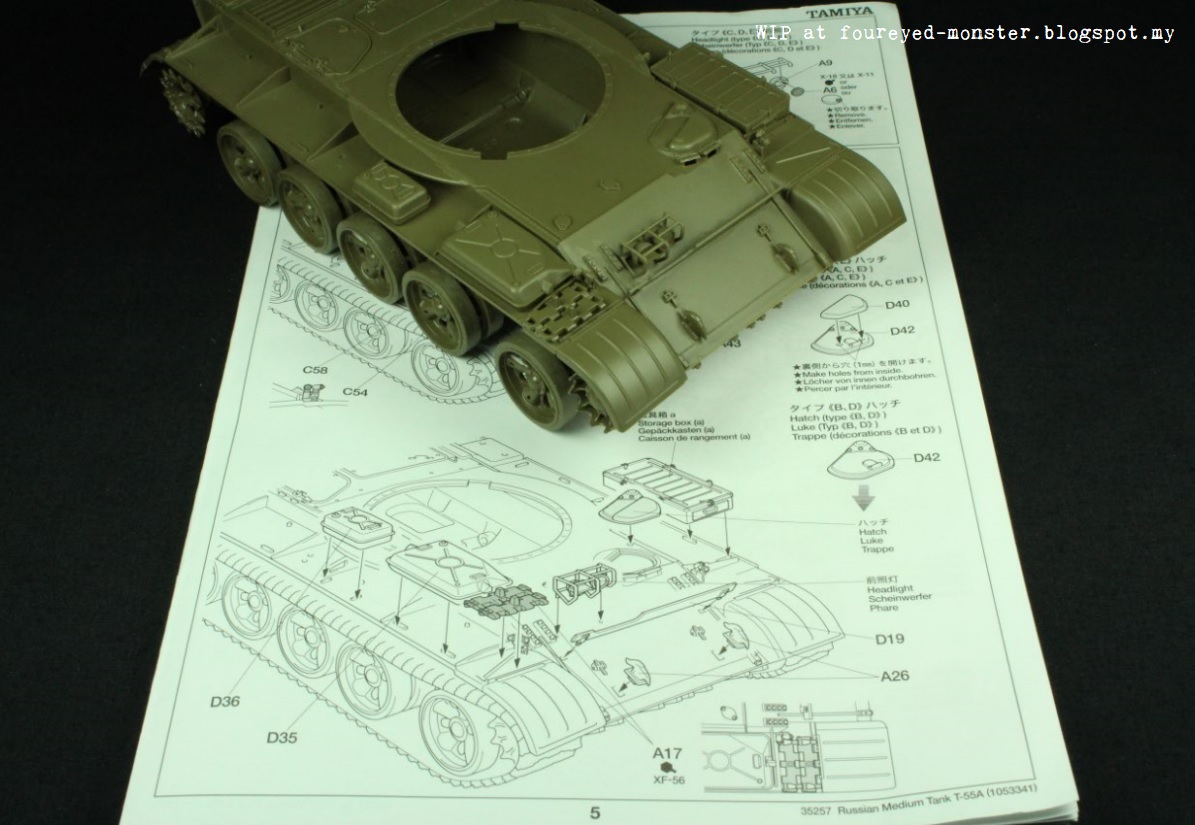
Things are slowly taking shape but it's early days yet. What struck me about the snowspeeder so far is how different the work flow has been from the Tamiya T-55A I'm building. In the Bandai kit's case, I've largely painted the separate pieces before assembling while for the Tamiya kit it has been practically the reverse i.e. assemble before paint. Interesting to say the least. I'll have to have a couple of more AFV model kits under my belt before I can say for sure if this is the work flow norm. 

Snowspeeder's bare upper/lower hulls with with an off-white basecoat, reddish orange stripes and dark grey panel lining
Closeup of the chipped paint effect achieved using Vallejo Model Color paints and the AK Worn Effect solution

Right at the end I couldn't resist painting the foot pedals on the pilot's side of the cockpit area (see immediate photo below). It is highly likely that the pedals will be hidden from view once the entire cockpit area and canopy are assembled. But the obsessive-compulsiveness in me took hold and I painted them anyway. In for a penny, in for a pound as they are wont to say.

I couldn't resist painting the foot pedals although they'll most probably be hidden from view

Up next for the snowspeeder will be its power generator (back engine), cooling fins and yet another hidden from view part i.e. the canopy roof. Until then, I should finish assembling the Tamiya T-55A tank and get some research reading done for a future project (it's a King Tiger if you must know). This week has reached it's mid-point so here's wishing you the best for what remains of the week.

http://shireworks.blogspot.my/p/custom-painted.html

Tuesday, 5 September 2017

T-55A Medium Tank [WIP - Assembly Part 2 of 3]

Assembly of the Tamiya T-55A medium tank continues with the addition of a variety of parts on its upper hull. Adding details that greatly enhance the tank's overall look, these parts consist of fender fuel tanks, fuel drums, storage boxes, headlights, spare tracks, grilles, exhaust, driver's hatch, tow cables, a snorkel, and an unditching log. Each piece contributes to a more interesting upper hull.

Tamiya T-55A Medium Tank build, work-in-progress (Part 2 of 3) - front upper hull
Tamiya T-55A Medium Tank build, work-in-progress (Part 2 of 3) - rear upper hull 

Continuing from where I left off, Step 6 saw the start of my frustrations with this kit's assembly process. The headlights, especially, were a nightmare to work with. Tiny parts with rounded surfaces combined with small areas of contact between surfaces meant gluing them together was almost an exercise in futility. Getting the headlights to stay in the correct position before applying glue was nigh impossible. I improvised by first lightly coating the parts with extra thin glue. This allowed the headlights to stick long enough to the opposing surface in order to be positioned correctly. Once the parts were in their proper position, more glue was applied to form a stronger bond.    

Of the two parts in Step 6, the headlight was tougher (nay, a nightmare) to assemble
Front end of the T-55A takes shape with the addition of its headlights, tow hooks, driver's hatch etc.
Closeup of the detailed parts on the T-55A's front end

After the fiddly nature of the headlights, the remaining parts of the T-55As' front upper hull were thankfully much easier to assemble and quickly fell into place. Details of note on the front upper hull include, among others, fender fuel tanks, storage boxes, spare tracks, driver's hatch and tow hooks. 

Fender fuel tanks, spare tracks and storage boxes add more detail to the front upper hull
T-55A Medium Tank, front upper hull with requisite parts (after Steps 5 through 7)

Then it was the rear upper hull's turn. Tamiya AFV model kits rarely include photo-etch parts but at least a mesh was provided to simulate the grilles. Measuring the mesh against a 1:1 scale diagram representation of the grille size, I proceeded to cut out four rectangular pieces of mesh (see below). These were an accurate fit for the relevant rear upper hull sections, and subsequently glued in place. 

A mesh was cut into four correctly sized pieces used to simulated grilles on the rear upper hull
Grille set (left) and storage boxes (right) for the T-55A's rear upper hull
Early stages of the assembly for the T-55A rear upper hull parts
At this stage, the rear upper hull still looks bare with more parts yet to be added

Yet more stowage boxes and fender fuel tanks completed the rear upper hull assembly. The only other accessory for the T-55A's upper hull were its tow cables which will be painted separately before being attached. Tamiya used a string to mimic the textures of a tow cable, which was fairly sufficient.

Rear upper hull looks much better with the addition of storage boxes and fender fuel tanks
T-55A Medium Tank, rear upper hull after Steps 8 and 9

Meanwhile, lots of cool details such as fuel drums, a snorkel and an unditching log were added to the T-55A's rear end. The snorkel in particular was specific to the T-55A version I was building namely the medium tank found in the Czechoslovakian army during the cold war. Both the fuel drums and unditching log were pretty much standard fare for almost all T-55/T-55A versions.

Yet more detail on the T-55A rear end (fuel drums, snorkel and log) and fenders (tow cables)
Fuel drums, a snorkel, an unditching log/beam and tow cables
T-55A Medium Tank's rear end (after Steps 8 through 10)

While steps 6 through 11 had rough moments, it wasn't anything a little patience couldn't solve. Tamiya's reputation for easy-to-assemble kits is well-earned and the difficulty I faced is largely in relation to what I'm used to before (snap-fit parts from Bandai or straightforward miniature figurine assembly). Only one-third of the assembly process to go before I have a T-55A ready for priming and painting. Next up will be the pièce de résistance of the kit, or any tank model kit for that matter, i.e. the turret. Until then, it's back to work on the snowspeeder. Updates in the next post, of course.

https://shireworks.blogspot.com/https://www.facebook.com/shire.works

Wednesday, 30 August 2017

Star Wars Snowspeeder [WIP - Rebel Alliance Pilots Wedge Antilles and Wes Janson]

Painting miniature figurines remains my first and strongest love in this hobby. I still get that same rush I felt when completing the paint job of my first miniature all those years ago. After weeks of vehicle painting and weathering - which I enjoy, don't get me wrong - it was a relief of sorts to get back to work on the miniaturised human form once again. And in a way, both Wedge Antilles and Wes Janson were the perfect miniatures to restart my long neglected figure painting work. That was because I didn't have to paint their eyes (arguably the hardest part to get right) which were covered by their helmet visors. Ironically though, the helmets turned out to be pretty difficult in and of itself. 

Rebel Alliance snowspeeder pilots in the Battle of Hoth: Wedge Antilles (left) and Wes Janson (right)

Getting any details on the helmets was extremely tough, more so when I needed to differentiate markings to the extent you could tell who was wearing them. Wedge Antilles and Wes Janson each wore helmets with distinctive markings that I had to recreate at 1/48 scale.

Snowspeeder pilots at 1/48 scale show in comparison to a five sen coin and a paperclip

Of the two, Wedge wore a helmet with relatively simpler markings. Simpler to paint freehand that is. Two huge green rectangles on either side of Wedge's helmet made the painting process considerably easier. It also helped that most other symbols on his helmet comprised simple squiggles and straight lines. Perhaps the most difficult part was the circles around the sides of the helmet. Painting a circle is difficult enough to do freehand so as you can well imagine doing it at this scale was ... difficult.

Wedge Antilles shown here at extreme close up to highlight his helmet and flight suit 
Wedge's flight suit panel was blue in A New Hope, but it became red and green in The Empire Strikes Back
Wedge in the Battle of Hoth as seen in The Empire Strikes Back, plus closeups of his helmet

In Janson's case, it was much more difficult to source for reference materials because as far as I can recall there were no full body shots of him in The Empire Strikes Back movie. From what I could find online, his flight suit was similar to Wedge's own attire, at least based on how Janson toy action figures were predominantly painted. In addition Janson's helmet was slightly more complex with a red-and-white checkered design in place of Wedge's simpler green rectangles.

Wes Janson, snowspeeder tail gunner and a good shot apparently
Less reference material was available for Janson, apart from his helmet
Wes Janson in the Battle of Hoth, and closeups of his helmet

As for the rest of both pilots flight suits, care was taken to achieve contrast as best I could at such a small scale. But in order to keep the pilots' colour scheme from becoming too cartoonish, I refrained from applying too much contrast. I used a Sideshow Collectibles Luke Skywalker Snowspeeder Pilot as reference when painting up the flight suits for both Wedge Antilles and Wes Janson.

Heavy is the burden we carry, for the Empire is about to strike back (... good haiku this is not)

Like a balm on a wound, the process of painting miniature figurines always provides me with a sense of soothing calm to the mind. Moreover, figurines also provide a sense of scale to a scale model kit as well as heighten the realism of the overall piece. And it's that wish to capture a piece of reality in miniature form that best explains the rush I feel, most avidly, when painting figurines. Here's hoping you feel that same rush in your own projects. And to my fellow Malaysians ... Happy Merdeka Day!

https://shireworks.blogspot.com/https://www.facebook.com/shire.works

http://shireworks.blogspot.my/p/custom-painted.html

Related Posts Plugin for WordPress, Blogger...