With so many terms being bandied about by modelers to label the oil paint weathering techniques used on scale model AFVs (armored fighting vehicles), it's no surprise confusion reigns as to what's what. Two techniques which stood out were the macro approach of
Oil Dot Filter Weathering and
Michael Rinaldi's Oil Paint Rendering which 'micro-manages' colors. What started out as a straightforward try at the former slowly morphed into a considered attempt of the latter. End results were a mash-up of both techniques and a pure application of either on sections of the King Tiger.
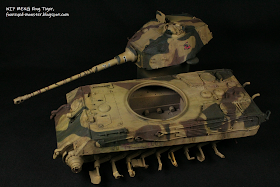 |
| Work-in-progress: King Tiger turret and upper hull after oil paints |
To modulate/weather the German WW2 three tone camouflage pattern,
Abteilung 502 scale modeling oil paints - namely
Snow White,
Black,
Magenta,
Yellow,
Payne's Grey,
Intense Blue,
Olive Green,
Raw Umber and
Neutral Grey - were used. Experience garnered from the
initial test run was critical in avoiding a dull monotone look. One way was to reduce usage of pure black in the oil painting process. But more than that, it also involved finding out through trial and error what combination of oil hues on which camouflage color (i.e. green, brown or yellow) worked best. A random placement of oil paints before blending with white spirit doesn't quite cut it as I found out during the test run.
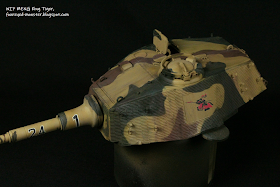 |
| Oil paint rendering/dot filter weathering produces tonal and hue variations on the three-tone camouflage |
 |
| Rendering/Weathering with oil paint is much easier on non-zimmerit areas |
 |
| When blended on yellow sections of the gun mantlet, the white oil paint simulates a faded, weathered look |
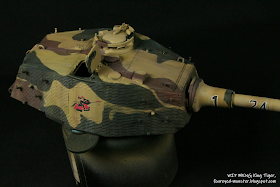 |
| When rendering/weathering on surfaces with zimmerit, care is taken to prevent oil paint from pooling in the crevices |
 |
| Decals held up to some rough work during the oil paint rendering process |
If I hadn't come across this oil paint technique, I would've probably been stuck doing simple black or dark brown washes (
not pin washes; see next paragraph for clarification) over the entire tank. It's only after I had done oil paint rendering and oil dot filter weathering that I realized the limitations of using just black or dark brown as your weathering go-to hues. Having better tonal/hue variation makes the whole piece look that more interesting, not to mention much more realistic.
 |
| It's a bit trickier to perform oil paint rendering/weathering on the gun barrel's small surface area ... |
 |
| ... but end results make it worthwhile as every little tonal/hue variation makes the piece look better |
At this stage, it should be pointed out that no outlines (or pin washes) have been done on the King Tiger. As opposed to a general wash, pin washes are more specific in application and bring out details such as rivets and weld lines in a tank. Pin washes tend to have a consistency (or surface tension) which allows them flow easily into the nook and crannies of a tank's surface area be it turret, hull or wheels. What this will do is to create depth in the overall look of the scale model. For now, nada.
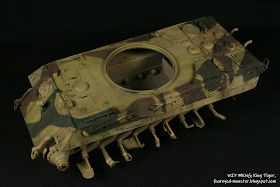 |
| Oil paints give the surface area of the King Tiger's hull a weathered look |
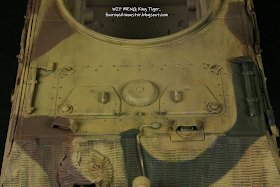 |
| Tools on the front section of the hull such as the axe (left) and hammer (right) will be painted soon |
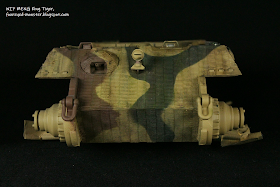 |
| Front glacis of the King Tiger looks less bland after oil paints have been applied and blended in |
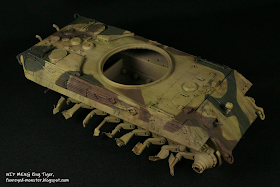 |
| Oil rendering/weathering wasn't applied to sections of the hull where the road wheels attach ... |
Meanwhile, no oil paint rendering and oil dot filter weathering was carried out in the lower section of the hull side where the roads are to be attached. The reason for this is that that section will likely undergo an extensive yet different type of weathering e.g. mud and dirt which would've covered up any tonal/hue variations that was created. As such, that section was left untouched.
 |
| ... reason being that a different kind of weathering will be applied to the hull side's lower section |
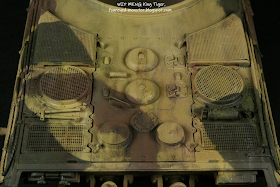 |
| At this stage, a lack of depth is to be expected as pin washes (outlines) have yet to be carried out |
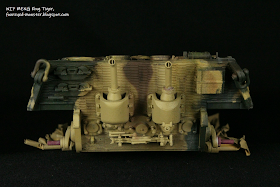 |
| Tonal and hue variation afforded by oils isn't as critical on the rear seeing there's a lot of details yet to be painted |
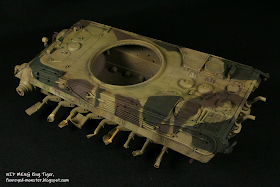 |
| Another angle of the results of the oil paint rendering/weathering on the King Tiger's hull |
Next up will be to create a sense of depth to the whole piece. That as mentioned above woud entail the use of pin washes in an outlining step. Also if I can find the time, I would also like to paint up the accessory details on the King Tiger such as its pioneer tools, exhaust pipes, tow hooks and cables. I find myself looking forward to working on the tank, the more it takes shape. It's a great feeling versus the hobby malaise I found myself in during the last quarter of 2018. Long may it continue!


I‘m using the same techniques albeit with a rather less scientific approach than yours. Probably one of the reasons why I‘m sometimes not entirely happy with the results.
ReplyDeleteYour tank is starting to take shape nicely FEM!
Thanks Moiterei! Sometimes, the scientific approach is the only way I know how although it definitely wouldn't hurt to let go and trust my nascent (if any) artistic senses.
DeleteIt looks awesome Kuan ! Can't wait to see the end result !
ReplyDeleteI hope you can continue on this great feeling , long may it last !
Greetings
Me too Mario. Feeling the hobby malaise sucked and I hope it stays away for a bit longer.
DeleteEach step is a lesson. Fascinating; it is fascinating.
ReplyDeleteEach step is a lesson to me too Suber XD ^_^
DeleteVery nicely done, top notch job!
ReplyDeleteMany thanks Phil for your kind words!
DeleteWoooW! Thats really awesome work!
ReplyDeleteThank you very much Michał.
DeleteVery nice work, thanks for explaining the techniques.
ReplyDeleteNo problem. I hope it helps. I'm always learning too.
DeleteComing along very nicely!
ReplyDeleteWhen you are done, it would be nice to see a picture of the tank pointing out all the different techniques applied to each area. E.g. engine deck: oil dot filter, pin wash, and pastel powder.
Thanks lasgunpacker! That would be so cool, provided of course I don't completely mess things up before I finish. If I did, I'll just fade quietly to black and pretend that this project never existed ;)
Delete